


Nothing is cuter than the book ‘Where the Wild Things Are', learn how to make this farmhouse baby nursery art inspired by the book.This post contains affiliate links. Thank you to Cricut for sponsoring this post.

I love Malakai's nursery decor above his crib. It's eclectic, kind of farmhouse and it's all the right tones. For this project I'm going to show you how to make this ‘Where the Wild Things Are' baby nursery art sign using your Cricut Explore. And I've included the .png for you to save to your computer and upload it to your Cricut Design Space using this method. Let's get started!
Supplies
- Wood Board (make your own or buy it from Wood Connection here)
- Black Vinyl
- Transfer Paper
- Foam Brushes
- 2 Paint Colors of your choice
- Cricut Machine
- Where the Wild Things Are Nursery Art File


First, prepare your wood surface. I used Rustoleum stain in Driftwood (it is now called Sunbleached). It's the perfect neutral grey and I used it on my Hair Pin Leg DIY Side Table. I then added my base color to the inlay of the wood. I wanted my monster to be light so I painted the base in Ceramcoat Charcoal. Next, you'll cut your image using the dial setting on vinyl. Using your weeding tool, peel up the monster's body. It'll leave behind the lettering and that's what you want.
Next, you'll adhere your transfer tape. I love the Cricut transfer tape because it has a guide on it to ensure you get an even image transfer. I use my scraper to press out the bubbles in the transfer tape.
Once your base coat is dry, place the vinyl image where you want it to be and be sure to press extra good while the transfer tape is still over the vinyl. This will ensure that you get a good seal and no paint will seep down.
Once you have the vinyl where you want and it's sealed down onto your wood, slowly peel up the transfer tape. This will now expose the area of the monster that you're going to be painting. For this color, I chose Ceramcoat Quaker Grey.


Before you paint your chosen color of the monster, take the extra time to paint your base coat over the area first. This will give you crisp lines and will help to avoid any bleeding. After the base color had dried over the monster, apply your desired color. I used the stippling method to apply my paint because I wanted a rough texture. Almost mimicking fur.
Now, wait 20 minutes until it is completely dry before using your weeding tool to remove the vinyl from the wood. I decided to sand it a bit for a rough texture but this is completely optional. I also sanded around the edges of the frame to expose some of the wood.
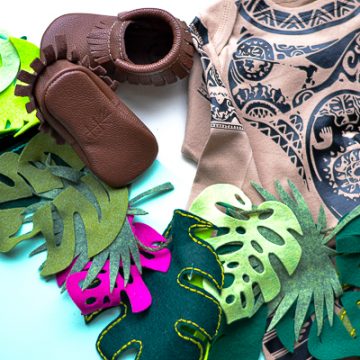
This goes so well with Malakai's wall. I've listed the sources of the other art below for your reference.

I also love the versatility of the Cricut Explore Air 2. Not only does it look good in the minty green but it's so functional for daily uses. We recently made Siaki a MLK, Jr. poster board for his biography report. He loved it and so did I because it was so easy.
- Felt Balls • Hello Maypole
- Narle Sign • Salty Bison
- Lightbox • My Cinema Lightbox
- Buffalo Wood Sign • Rugged Heart
- Antlers • Anthropologie
This post does contain affiliate links, thank you for your support.
This is a sponsored conversation written by me on behalf of Cricut. The opinions and text are all mine.

- Free Coffee SVG Files – Boom! Roasted - October 5, 2021
- Free Beer SVG Files – “It's What's For Dinner” - September 7, 2021
- DIY Back to School Banner with Cricut - August 13, 2021

Carol says
Very cute idea!
Laurie says
This is adorable! I love The Wild Things and used to read this to my kids all the time. Look for your feature at Tuesday’s Brag About It Link Party! Hope you’ll join us!
Christine says
I love the artwork, you did a wonderful job!
Lindsay says
Thank you so much. It’s such a fun piece for his nursery.