
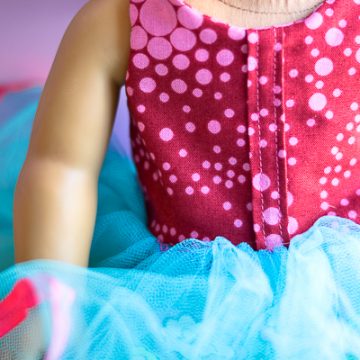
Infant Leather Moccasins are all the rage. They’re incredibly easy and inexpensive to make. Learn how to cut Cricut leather with you Cricut Maker and make your own baby shoes today.
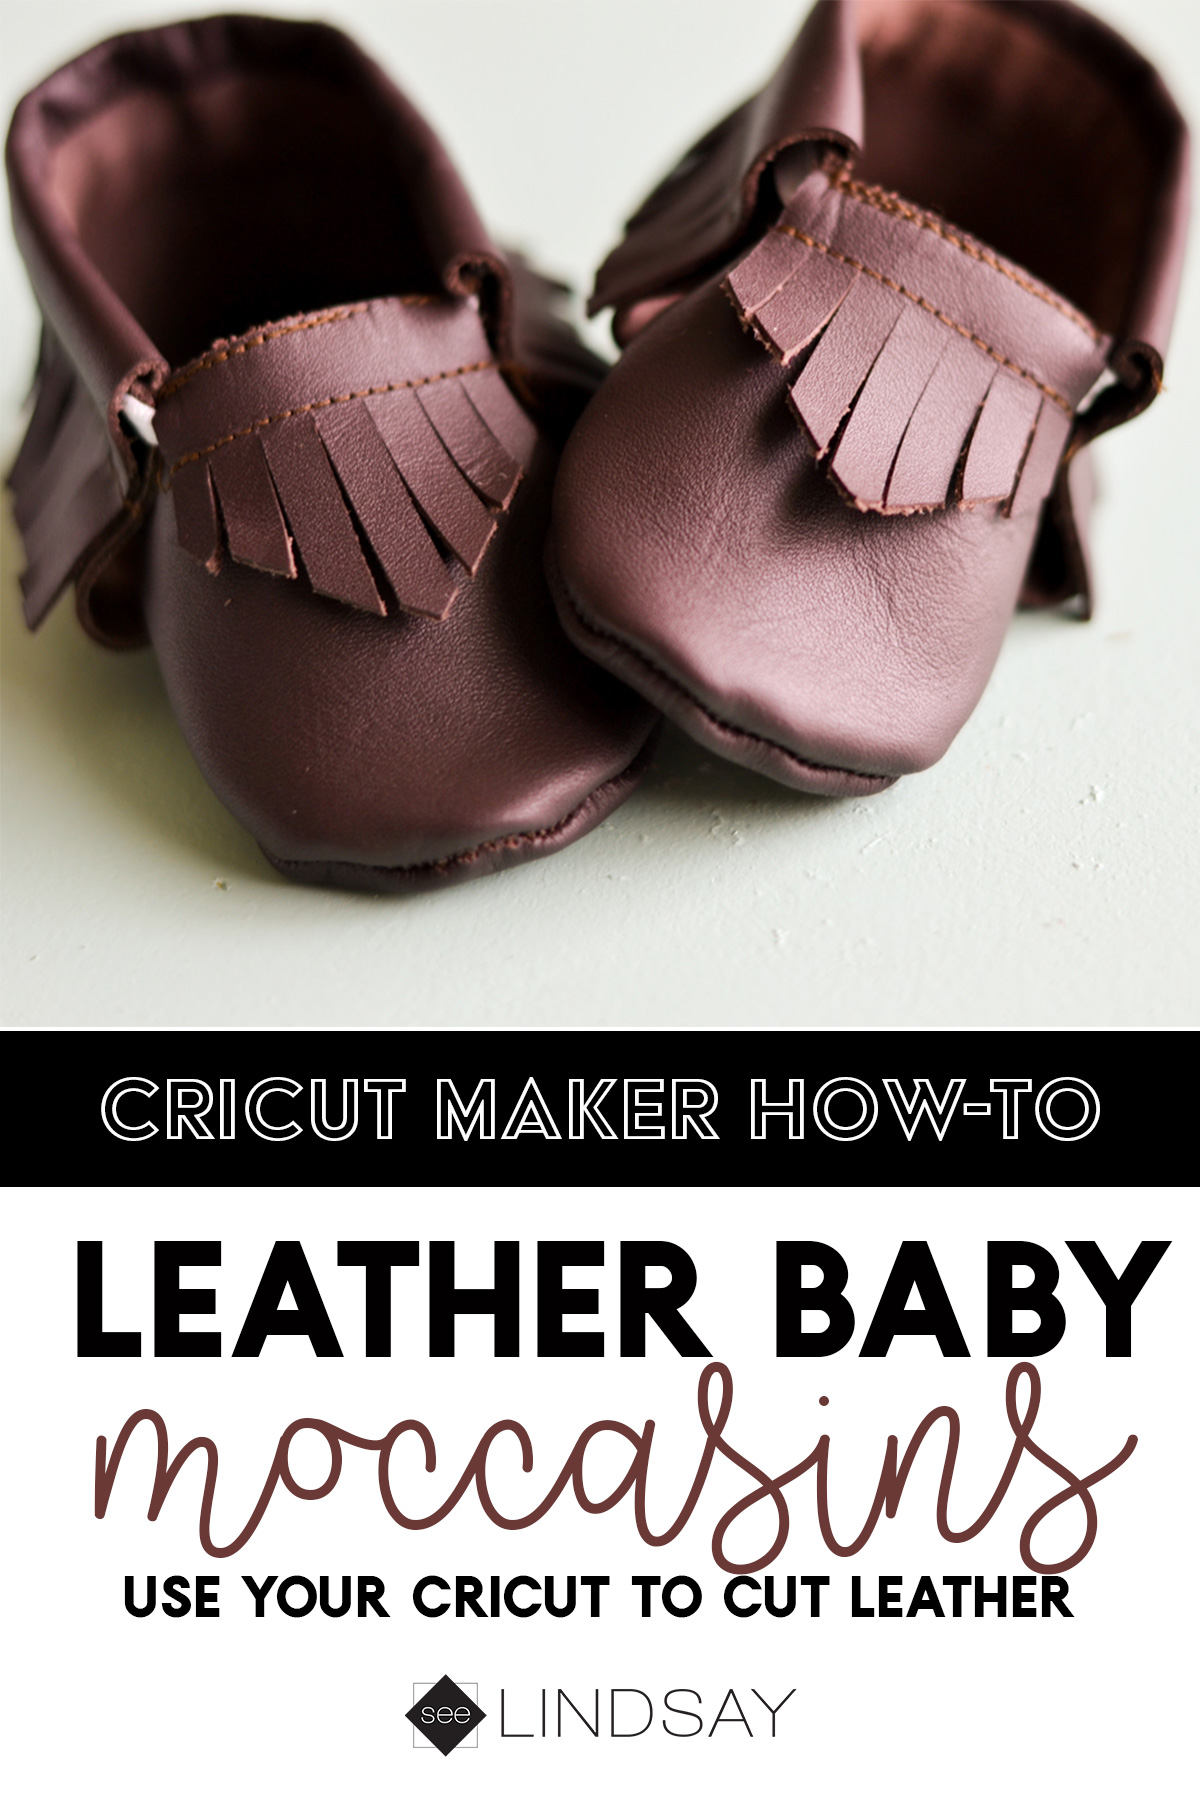
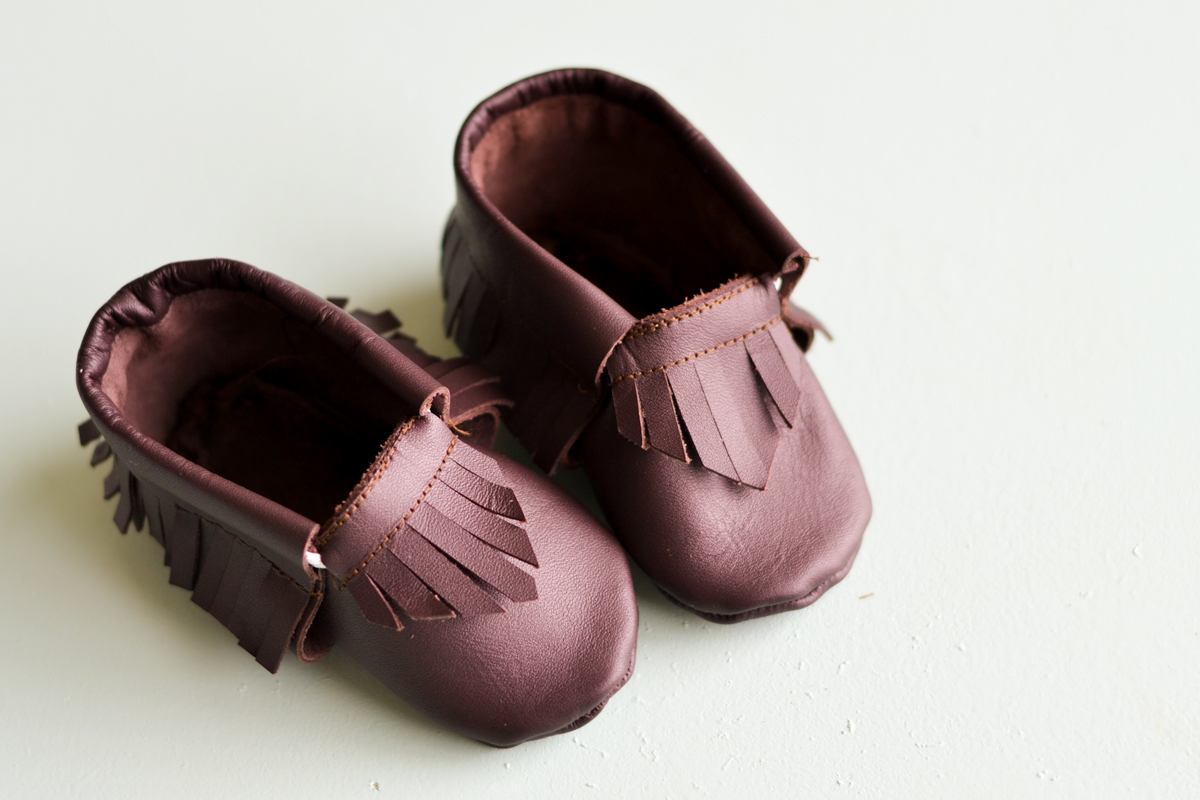
My two youngest children had these shoes and they were really expensive to wear. If they’re a toddler, you can definitely get your money out of them but as an infant, they’re more for looks. Use some Cricut Leather to create your own at a fraction of the cost and make those baby feet irresistible.
But your baby is going to be the most stylish baby in the block by using this leather moccasin pattern that comes with a Cricut Access membership.
Supplies for your Cricut Leather Baby Shoes
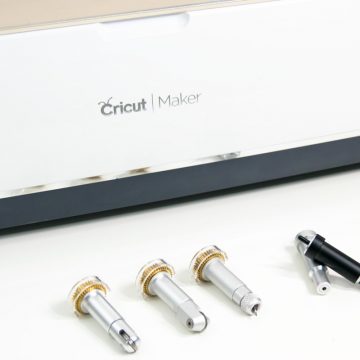
- Cricut Maker
- Cricut Genuine Leather
- Cricut Strong Grip Mat
- Cricut Design Space Moccasin Pattern
- Sewing Machine
- Matching Thread
- Quilt Binding Clips
- 1/4″ Sewing Elastic
How to assemble your Leather Moccasins
For these infant leather moccasins, you’re going to want to use a soft leather. You’re going to cut your vegan leather and animal leather the same way. I like Cricut Leather because it is soft and perfect for those baby toes.
Step One – Lay your leather smooth side down on your Cricut mat. If you find that your leather is grainy or won’t stick to the mat well, lay some transfer tape on the fuzzy side and then apply that side down on your Cricut mat.
You can also use some painters tape or masking tape to hold down the edges of the leather. Cricut recommends using the Strong Grip Mat but I have also used the Standard Grip Mat or the Fabric Grip Mat and it held fine.
Cricut’s Genuine Leather is leather that I have found I like. The back has had most of the fuzz removed but it is still soft. Cricut
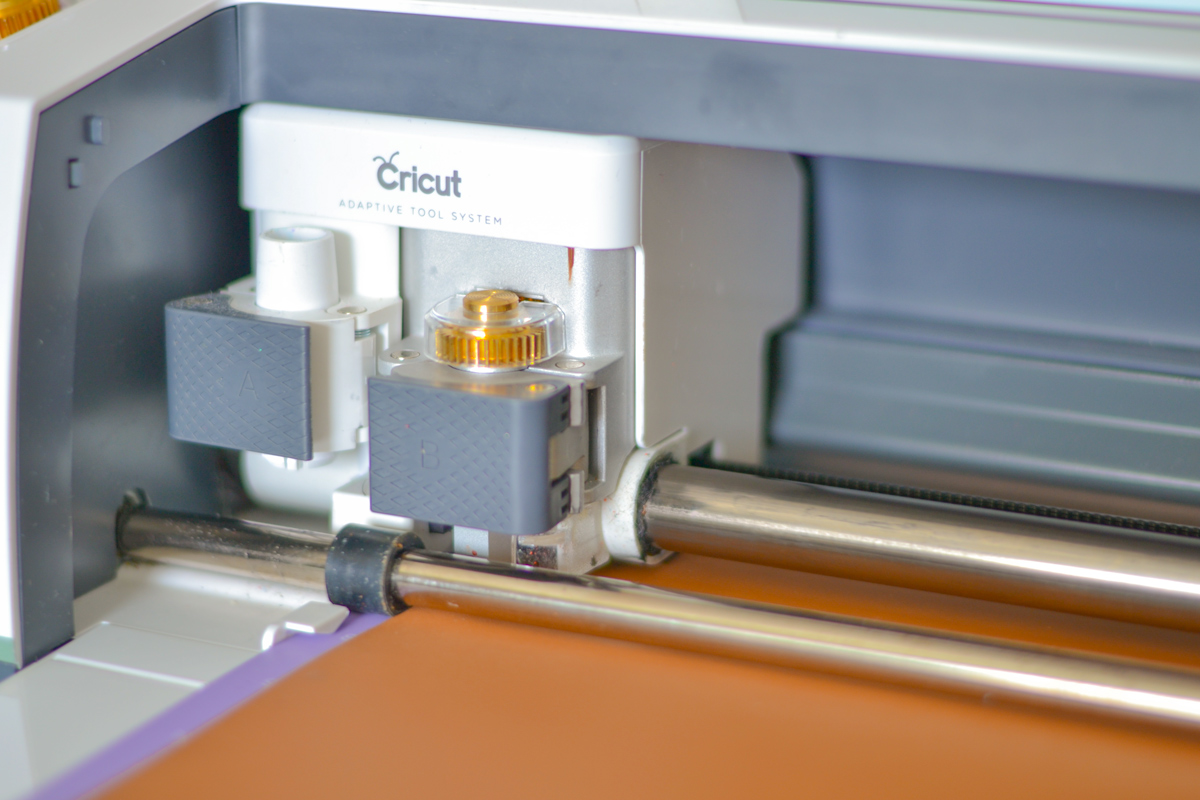
When you cut leather with the Cricut Rotary Blade, you get a cleaner cut. The rotary blade isn’t pulling the leather like the Deep Cut Blade would do and so you’re not going to go through materials quickly.
Step Two – Open the Design Space project using this link here or search for it in Design Space.
Move your small white rollers all the way to the right so it doesn’t make a mark on your leather.
Place your Cricut Rotary Blade into your Adaptive Tool System and load your mat with the attached leather. Because the Genuine Leather setting does not allow you to choose the Rotary Blade, you're going to have to adjust some settings.
I chose to edit the material settings for canvas. I just adjusted the force setting to 400 so that it would cut cleanly through. I chose more pressure before I cut as well. This gives an extremely clean cut. If you're using a desktop computer and you have the knife blade, use that. This is a way that you can kind of jimmy rig your mobile device to cut the leather just as good as the Cricut Knife Blade.
Remove your cut baby shoe pattern from the mat and set aside.
Step Three – Take the fringed back piece and the larger rectangle and sew them right side to the wrong side.
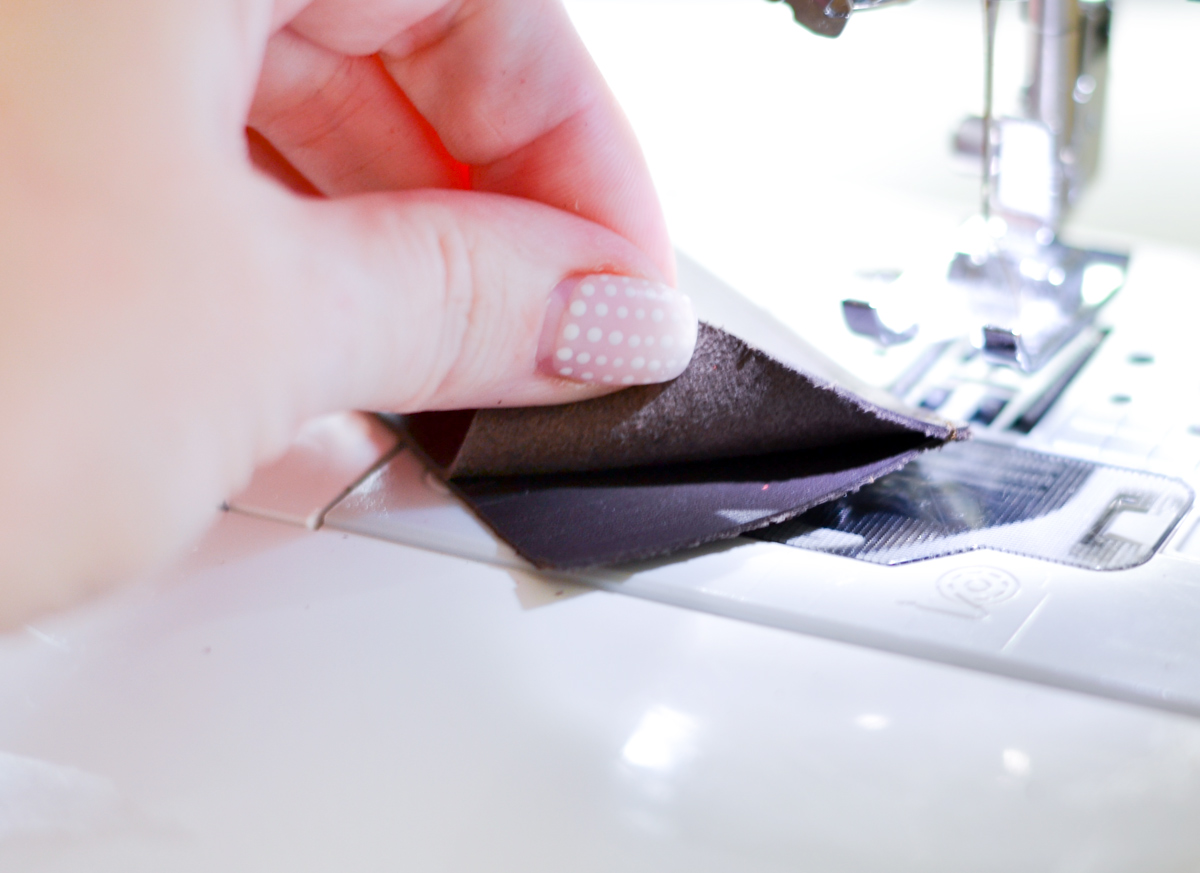
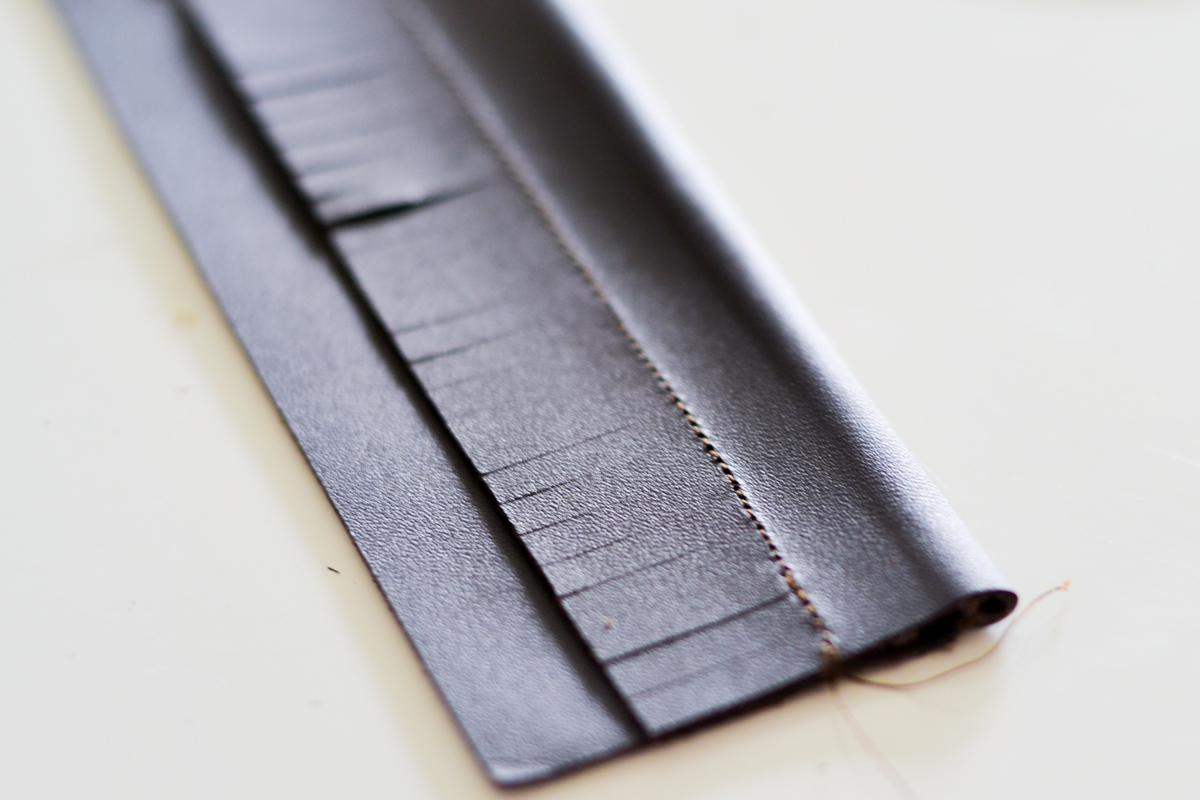
Flip the fringes piece over itself and then create a loop so that the elastic will fit through. Sew about 1/2” from the top of the fringe piece.
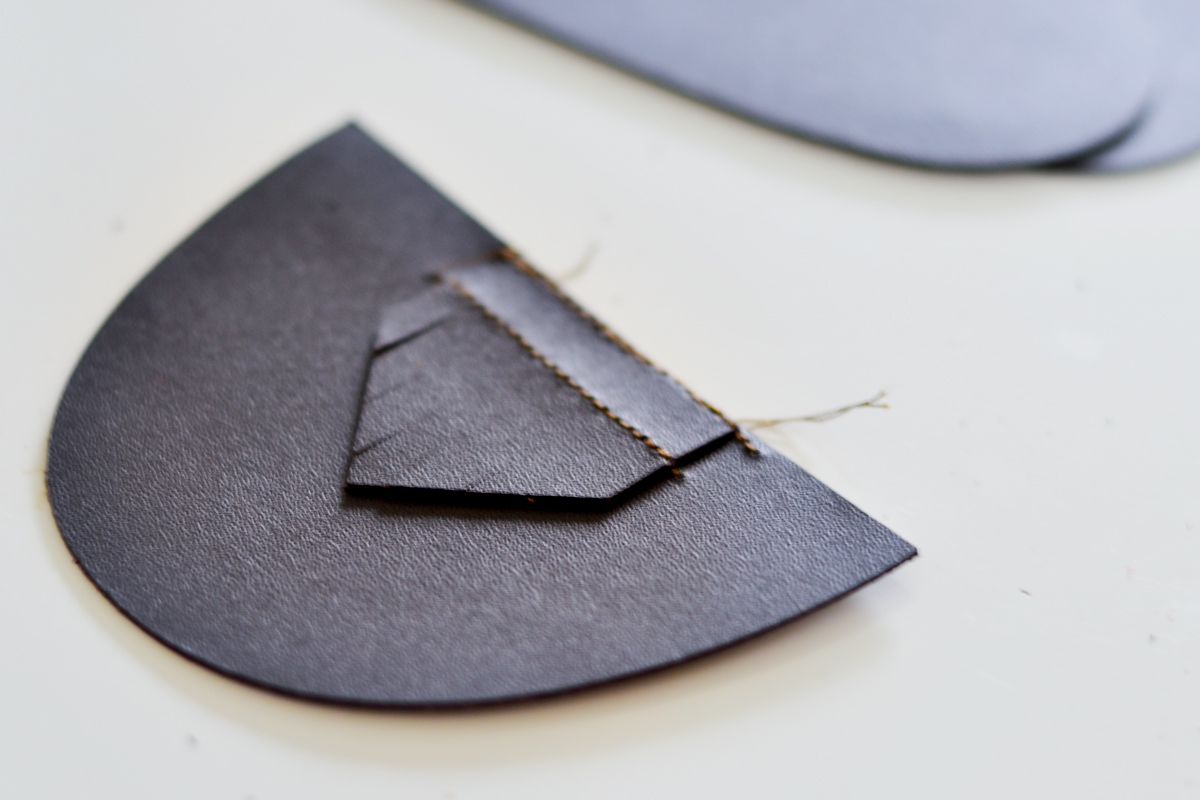
Step Four – Take the small fringe piece and the toe piece and sew it on top of each other. You're going to want to have them laying right side up. Stitch right along the top as close as you can. Then about 1/4″ below that, stitch another straight line. Be sure to reinforce the edges of each stitch.
Step Five – Find the center of the sole of the shoe and the large fringe back piece. Follow along the curve and clip them together in place. Sew a 1/4″ seam along the edges.
Sometimes trying to get the Cricut leather to fold curved can be difficult. If you need to, just do the sides and then hand stitch the back curve, that works just as well.
Step Six – Take the sole of the shoe and the toe piece and place them right sides together. Start by using a binder clip and place it in the center holding those two pieces together. Then follow along the curve of the toe and begin by stitching the shoes together using a 1/4″ seam.
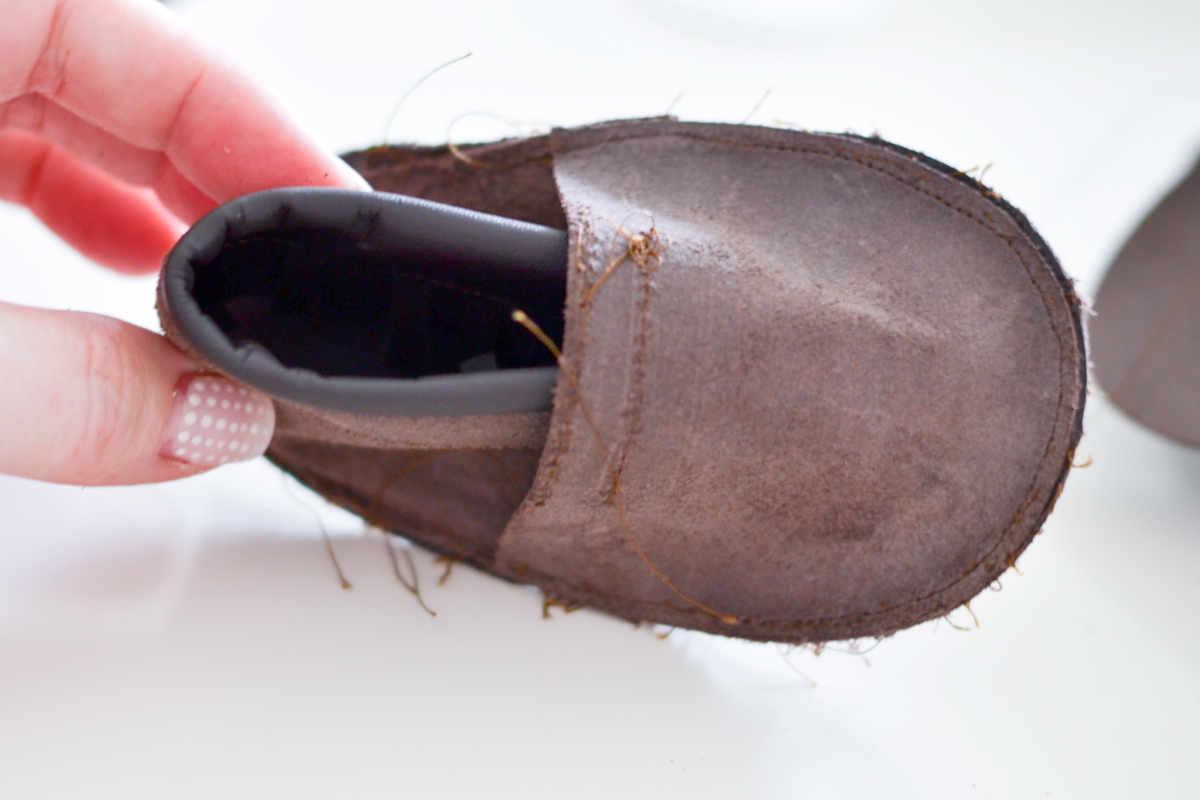
Step Seven – Turn the shoe right way out and then use a dowel or a bone folder to push the leather seams out to smooth out the shoe.
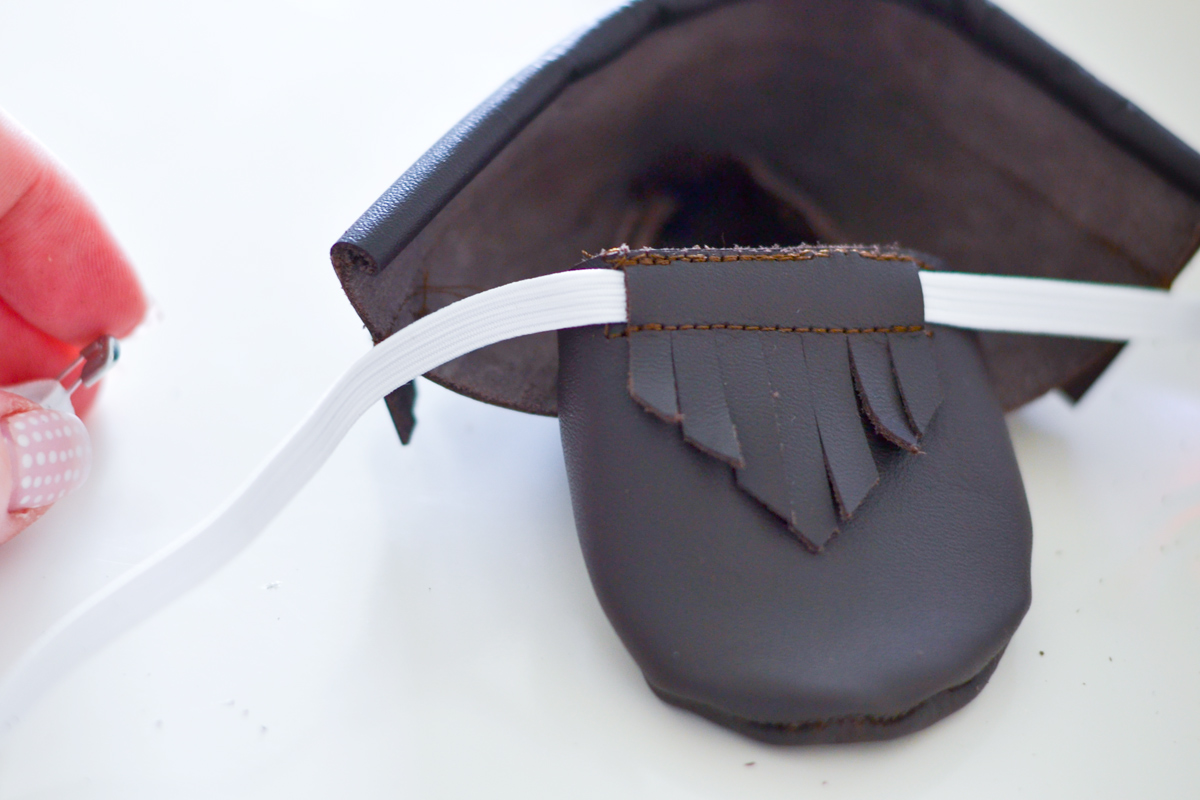
Take a small safety pin and thread the elastic through the shoe and pull them taught. Sew a zig-zag stitch across both ends together and then clip. Tug at the top of the shoe to try and shimmy the elastic so that the part where they connected is hidden.
I like using my Rotary Blade to cut the Cricut Leather. If you have the Knife Blade, this will work just as well and I select the garment leather setting. To learn how to cut your Cricut Leather with the Cricut Knife blade, click here.

This is a sponsored conversation written by me on behalf of Cricut. The opinions and text are all mine.

- Free Coffee SVG Files – Boom! Roasted - October 5, 2021
- Free Beer SVG Files – “It's What's For Dinner” - September 7, 2021
- DIY Back to School Banner with Cricut - August 13, 2021
kathie says
Cute!
Kiki Comin says
super cute, girl! love all of it.
Lisa at Mabey She Made It says
These are darling!
laura londergan says
these are so cute!
Mrs Major Hoff says
so darling!
Leslie D says
So bummed the tutorial for the mocs is not up =( I’ve been checking back a few times but is not up yet. I was so excited when I found the pin for them.. Impatiently waiting for that tutorial! =)
Frenchie says
Leslie – Plan for April. I know I’m so disappointed I had to take it down but I also don’t want to be sued! I promise it’ll be up and I’ll be able to offer the SVG file as well! So sorry! I’ll probably plan on a whole new post and have the tutorial here as well. Thanks for being patient, XOXO
Leslie D says
Totally understand! Don’t want that for sure! I’ll be on the look out for April! =)