
I love cutting felt with my new Silhouette Cameo 4. Learn how to make these mini stockings out felt for your own DIY Advent Calendar.

Thank you to Silhouette America for sponsoring this post. All thoughts and opinions are my own.
This DIY Stocking Advent Calendar turned out so adorable. I used my Silhouette Cameo 4 to sketch out the numbers and then I used some embroidery floss to label them. This advent calendar turned out better than I hoped for.

How to Make an Advent Calendar
For your advent calendar, you're going to want a few things. The Silhouette Cameo 4 makes cutting felt so easy and consistent that I love using it to make adorable Christmas crafts. I decided to hang my advent calendar around our front door just because we don't have a fireplace and it's easy enough that the kids won't be tempted to take something every time they pass by.

Supplies Needed for your DIY Advent Calendar
- Red and White Felt
- Hot Glue and Glue Gun
- Fabric Marker
- Silhouette Cameo Pen Holder
- Embroidery Thread
- Embroidery Needle
- Heat N' Bond Hem Tape
- Silhouette Studio Shape #52501
- Silhouette Studio Text #84062 - Reagan Sketch
I began by prepping my felt stocking image in Silhouette Studio. Use shape #52501. Since this is a lace-up card, I needed to remove the holes punched along the edge. I released the compound path and deleted all the holes and I duplicated the image 24 times for the 24 days of December. These mini felt stockings are 4″ tall.

I also made a rectangle that was .5″ by 3″ and duplicated those 24 times for the stocking tab.
Use the Reagan Sketch font to create your numbers and then insert your fabric transfer pen into the Silhouette Pen Adapters and then use the Sketch Pen Adapter to have your Silhouette Cameo 4 read the correct blade type.
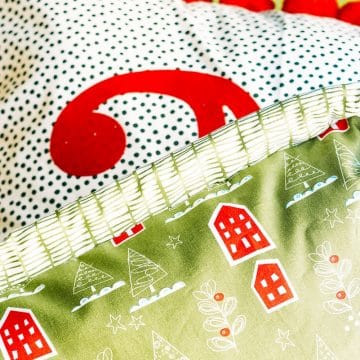
The red stockings cut out extremely fast but the scalloped cuff was a time-consuming process. When cutting any fabric with the Silhouette Rotary Blade, the blade needs to adjust itself so it will feed your mat and then rotate and go back to cutting that shape. It took a good 3-4 hours to cut 48 cuffs so just stay near your machine just in case.
It's very important that you use a mat that has a good tack when you're cutting any fabrics with your Silhouette Cameo 4. I like using a brayer tool to make sure it is completely secure to the mat and will not lift.

how to cut felt with the silhouette cameo 4
How to cut felt with the Silhouette Cameo
- Prepare your Felt
Prepare by cutting your felt into 12″x12″ squares to fit onto your Cameo mat. If you're using interfacing, apply that now before you cut your shape. Do not peel the backing paper off just yet.
If you're not, be prepared to have a lot of fuzz on your mat. Using Wool Felt is a good way to avoid this. - Place Felt on the Mat
Place your mat on to a standard grip mat and use a brayer to press down. If you're using interfacing, place that side down on your mat.
- Insert your Rotary Blade
Insert the Silhouette Rotary Blade into carriage 2 and lock.
- Edit in Silhouette Studio
Select your shape in the Send Window and on Tool 1, select No Cut. Scroll down to Tool 2 and select the Felt, Acrylic setting and select cut. Your shape will now be outlined in blue rather than red and it will show you all the turns you rotary blade will make.
- Load your Felt
Load your mat with the felt into your Silhouette Cameo 4 and then press send in Silhouette Studio. Wait until your cut is complete and then unload.
- Remove Felt from your Mat
Once your felt is cut, remove your shape from the mat. Some small fragments of felt can still be attached in small corners and cut so just use some handheld scissors to cut those carefully and by not pulling.
If you've used interfacing, go ahead and remove the backing at this point.
How to embroider your mini felt Christmas Stockings
I used a blue washable fabric pen but if I had to do it over, I'd use an air disappearing one. I followed the sketch of the numbers using all 6 strands of the embroidery floss using a simple backstitch.
When I went to spray the felt with the embroidery already attached, it made the felt bleed and dyed some of the floss. I was going for an antique finish when all was said and done but I didn't expect it. To me it was a happy accident but it may not be the look you're wanting.
how to assemble your mini stockings
To assemble your stockings, you're going to want to start with prepping the cuff. After I've cut out all the cuffs with my Silhouette Cameo, I used some Heat N' Bond tape to create the adhesive to the stockings.

I laid all 48 cuffs side-by-side and then laid the tape across and pressed with my iron. I then peeled off the backing and adhered all the felt cuffs to the stockings one-by-one.
Find your stocking tabs and it's time to glue them to the inside of the stockings. I used the back of the stockings and laid them out in front of me. Use a small bead of glue and then place one end of the tab on the glue. Wait a few seconds until it's held and then fold the tab over and glue it to the other end piece.

Now that my pieces are assembled as one, I'm going to attach each front to the back of the stocking. Use some hot glue and run it in 2″ sections adhering the front to the back. If you do the full stocking all at once with the glue, it cools and does not get you the full adhesion you'll need.

How to Hang Your Stockings on Garland
To hang your advent calendar pieces on to the garland, just slide one of the branches through the tab and then bend the branch slightly upwards. If you have a fresh garland, I recommend using some floral wire and twisting the wire through the tab and then on to the branch.


- Free Coffee SVG Files - Boom! Roasted - October 5, 2021
- Free Beer SVG Files - “It's What's For Dinner” - September 7, 2021
- DIY Back to School Banner with Cricut - August 13, 2021


Hey, Let's Chat!