

So here for my last entries to the Cricut Design Space Star Challenge for the month of September. Remember, our theme for Group 16 was On the Table and Dreaming. We got to choose whatever celebration we wanted and roll with it. I chose to do a wedding. I have a close friend of mine getting married soon and so we wanted to test out some different table setting decor. I used my Cricut Explore to do all of this for me and it was awesome!
 We decided to use this pink and ivory stripe paper from My Minds Eye's line Market Street from the talented Jen Allyson. She is also competing in this challenge and she actual took the whole thing last month. I always tell her she's lucky at everything and to stop entering contests, lol. This is honestly my favorite line that I've come across in a long time. It has so much to offer and the color ways worked perfect for the projects we wanted to use for this months challenge.

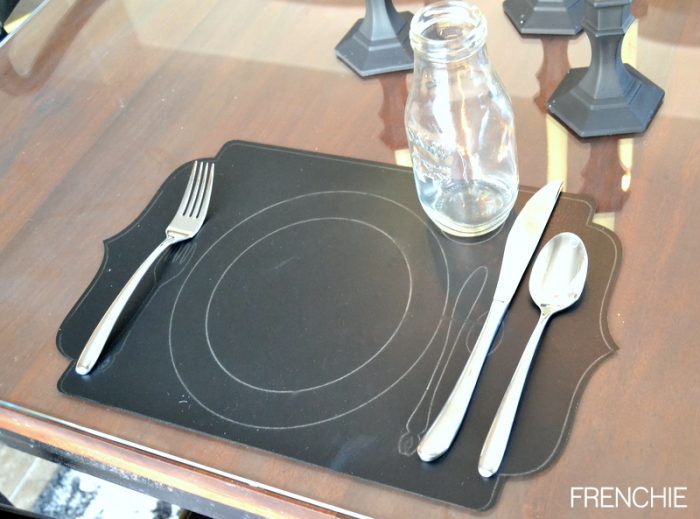
You've already seen the Backdrop and the DIY Marquee Letters in the last posts, so now I am going to first show you the table setting. I used the Draw and Cut feature for all these projects and it was so easy. For this project I used the Chalkboard Vinyl and the silver marker that comes standard with your machine. I used several circle shapes and found different utensil shapes in Design Space and placed them on either side of the ‘plate'. I made sure that I highlighted the lines that I wanted to be drawn as drawing lines and made sure they were all the same color. If you wanted to make them different colors to change it up, you can do that. Your Cricut Explore will stop between each draw and you can reload your marker. I also made sure that the shape I wanted cut was marked as a cutting line.
 That was it! I stuck it to the glass that protects the wood on my table and when I was done, I peeled it right up. So easy!
[line]

The next project I took on were the super simple favor boxes. It was the same concept with the vinyl. Make sure your cut lines are set to cut and writing lines set to draw. I used the Don Juan font on all the projects here. I love the informal look of it all but it doesn't look inexpensive.
[col1]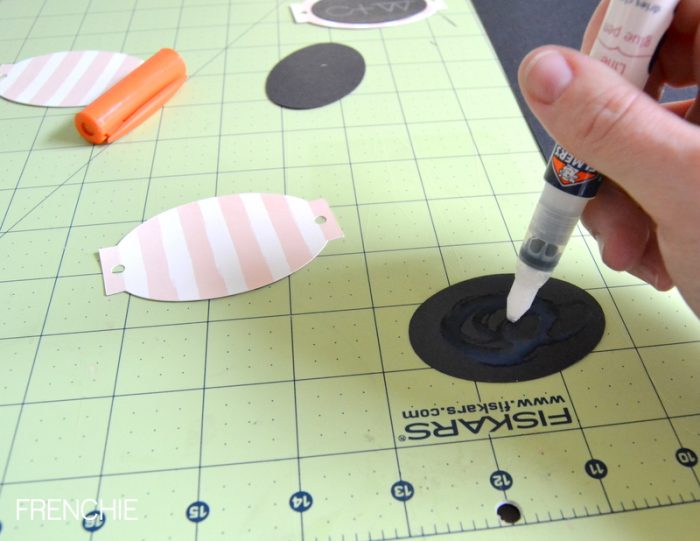 [/col1]
[col2]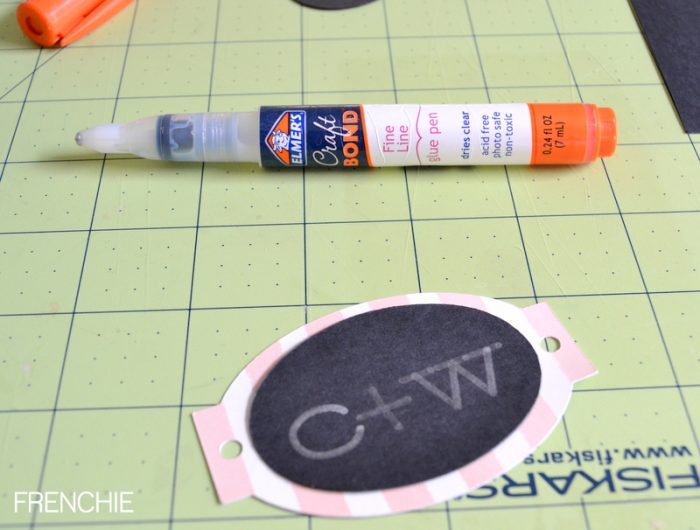 [/col2]
[col3] [/col3]
For the tying, I wound the twine ribbon around the bottom of the box and then looped it back around and tied it in a bow. Pictures explain it so much better than I can! Also, the joys of being a blogger is that you get to work into the night and have the worst lighting ever for pictures!
[line]

And last, but definitely not least was the menu. I tried two, one on the black and one on the pink vellum. Vellum was a quick no. First, I didn't think it sounded good, second was that the green was too strong and I realized quickly that even though the back side of the paper had green in it, I didn't want to use that side of the paper. It would have made this wedding too cutesy for me. On other occasions, I totally dig those polka dots!

Again, same concept with the draw and cut and then glue it on to your background. For the styling, I just added it to one of these frogs that are so popular in scrapbooking now.

I used a lot of dollar store items here. There are the candles and the candle sticks that are just painted black with Rustoleum's flat black along with the frogs. You can really use a lot of inexpensive things and make them look fabulous if you use your imagination and a little creativity. A great person at this is Margie Romney-Aslett, she can take a dollar store item and make it look like a boutique item with a little imagination. She's fab!
If you have a website and would like to be an affiliate of Cricut's sign up here. Also, make sure that you're receiving Cricut's emails, just scroll to the middle of the page to enter it.
And wait, there is a contest that YOU can enter as well! Check out the details below.

Enter the Cricut-I Made It! Contest
Because It’s Time to Make It Big
It’s time your creativity pays off so you can really make it. Cricut has just announced the second phase of the Cricut – I Made It! contest and this time they’re awarding one winner their own Make it Now™ project line to be sold in Cricut Design Space™!
To help create your line, Cricut will fly you to their headquarters in Salt Lake City to work side-by-side with their design team. Then you and a guest will enjoy an all-expense paid stay at the Grand America Hotel – a luxury resort in Salt Lake City, home to the best skiing in the world.
The winner will be featured on Cricut.com and every time a Cricut user purchases your project, you’ll earn money. Cha-ching! Cricut will even help with your publicity.
Cricut is upping the fame game even more…camera, lights, action….
Cricut has partnered with the The Design Network – a premier online design channel – to showcase the Cricut- I Made It! winner this fall. You’ll get a spotlight feature on a network dedicated to celebrating great designers and their creative star power.
Cricut’s judges, including DIY Diva Alison Deyette and two creative directors from Cricut, will pick 50 finalists from the best project entries based on creativity, use of materials and technique. Who will pick the ultimate winner? You, the public, will vote online in October.
To enter the Cricut – I Made It! contest, all you need is a photo of an original project. You can upload up to five photos (which can be five individual projects or multiple photos of one project).
You have until September 30th to enter. What are you waiting for? It’s time you Made It big! Head to cricut.com to enter today.
Disclosure | I am a member of the Cricut Blogger Network. I may receive prizes in exchange for my winning projects. Even though I am not being directly compensated for these posts, I am under consideration for a prize with Cricut Design Space Star. All opinions are 100% my own.

- Free Coffee SVG Files – Boom! Roasted - October 5, 2021
- Free Beer SVG Files – “It's What's For Dinner” - September 7, 2021
- DIY Back to School Banner with Cricut - August 13, 2021

Hey, Let's Chat!