
 This DIY Hairpin Leg End Table was just as easy as my other DIY Side Table and costs were around the same except when it came to the legs. The longer the legs, the more expensive it's going to get but you can for sure get away with only using 2 just like Alison with Two Thirty-Five Designs did with her table. That's where I got the inspiration from for mine but I wanted mine to be portable and change locations whenever I felt the need!
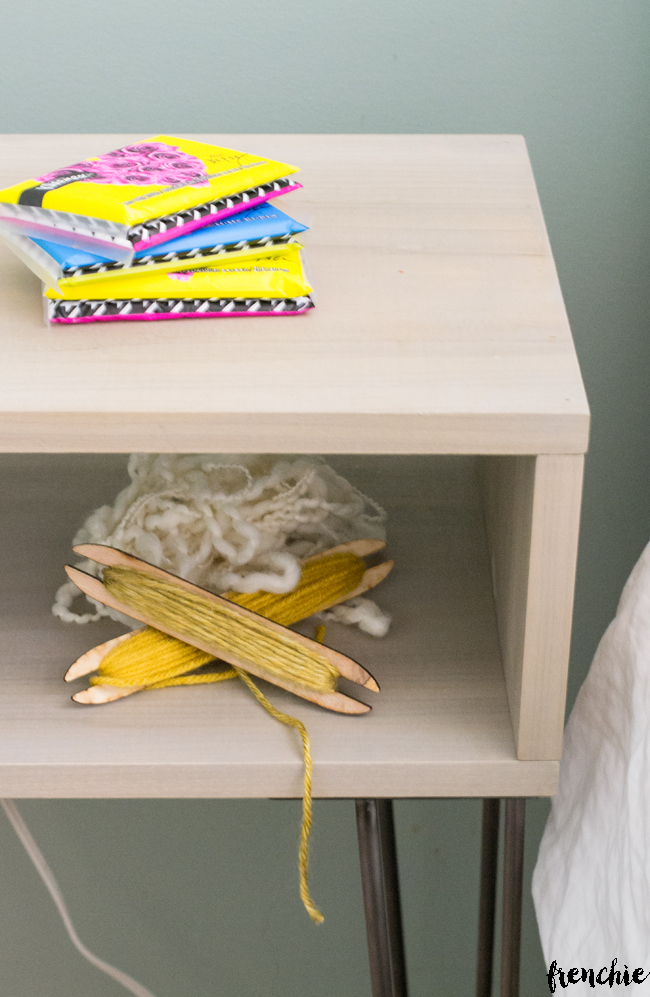 First things first. I headed to Home Depot and grabbed the essentials. A 12″ board of Poplar wood and had them cut it on site. They cut two 22″ sections and 2 6″ sections. I grabbed some Rustoleum stain in the mini jars and the color that I chose is called Driftwood, a perfect washed grey. I needed some Gorilla Glue and some 1 1/4″ screws for my Hairpin Legs. Speaking of the legs, I grabbed mine here off Etsy. They were made to order, fast shipping and I was really pleased with the quality.
I began first with sanding and staining the wood. Of course, the parts where the saw left those brittle cuts on the wood, those were going to be the inside of the table. However, I wanted to be sure and get a good covering on the wood. I only did one coat and this was my first time using this stain. I really liked it. I just wiped it on and let it sit for 2 minutes to get the look I wanted and then took a lint free cloth and wiped it off. I set it aside to dry for about 2 hours.  Then it was time for the assembly. It's literally a box. I started with a piece of the 22″ board and a 6″ piece. I placed some glue along both edges that were going to be touching and I then used my Ryobi AirStrike nail gun and nailed them in place with 1 1/2″ finishing nails. I did the 6″ sections on both ends of the 22″ base and then laid the other 22″ top on top of the other pieces.
 This is when they say clamps are necessary but did I have them, no. I picked them up at the store but I didn't know what size to get, if I'd ever use them again so I put them back. Get some so you don't strain yourself. Even though these pieces were cut square, they weren't nailing together square so I had to do some maneuvering. I got it into place but it's not perfect and I'm ok with that, you may however not be. It's completely up to you.
  Now that the box is assembled, go ahead and grab your drill and hairpin legs. You want to be sure that your screws will be able to penetrate the wood so begin by marking the holes. Then take an awl and dig into the wood a bit or hit the awl with a hammer to create a divot. Now if you want you can take the extra step and use some liquid nails to really secure the hairpin legs or just screw it directly to the wood like I did.
I just used some spray poly and allowed it to dry for 48 hours in my garage and now it's up in my master bedroom. I've got plans to paint my walls a creamy white and to add some accessories. Robin's Egg Blue sort of weighs on you after a while…it's still a pretty color though, it's just time for a change.  I really like the weaving that I did with some fabulous bloggers one night, Remodelaholic, Amy Robison, and The Project Girl. We had so much fun together and we got a little wild.
A For some more décor inspiration, visit KLEENEX®. I'd love to hear how you are inspired and what projects you'd like to take on. 

- Free Coffee SVG Files - Boom! Roasted - October 5, 2021
- Free Beer SVG Files - “It's What's For Dinner” - September 7, 2021
- DIY Back to School Banner with Cricut - August 13, 2021

Andrea Kruse says
I need to make these for my kids’ room. So much easier than trying to find the perfect nightstands. Love how this turned out. #client
Saul says
Love the design! In the past I’ve bought legs from ModernLegs.com as well and I was very pleased with the quality.