
Have you really pushed the limits with your Cricut Maker yet? Making custom cake stands out of wood or custom cake stands out of chipboard is easier than ever. Utilize the Cricut Knife Blade in a way you never thought before.
I, like many other mothers, enjoy making a birthday party better than ever. I don’t like to spend that much money buying custom things that will most likely never get used again. Creating this custom cake stand using my Cricut Maker was one of the most genius things my friend could have ever thought of.

Supplies for your DIY Cake Stand
- Chipboard or Basswood
- Cricut Maker
- Cricut Knife Blade
- Painters Tape or Masking Tape
- Strong Grip Cricut Cutting Mat
- Cricut Design Space File of Rocket Ship Cake Stand
- Coordinating Cardstock
- Xyron Creative Station - 9”
When you're making your own custom cake stand with the Cricut, you have to look at the dimensions of everything. Your cake, the width of the shape, your cut allowance on the material, and the thickness of the material.
Begin by pulling up the shape that you want to cut. Look for a shape that has a wide bottom and straight line for stability.
The top doesn’t have to be as wide because we’ll square it off to make a flat surface for the tray. To do that, move your object to the latitude and longitude of 0.
Click on the shapes on the left-hand side and add a square. Click on the lower left lock and then set your square to about 2” tall and an inch or two wider than your shape.
Select both the square and the shape and hit the slice function. If Design Space has the sliced feature grayed out, it means that you have more than the two layers selected. You will have to ungroup your main shape if it has more than one layer.
This will create a flat surface on the top of your shape and then you’ll duplicate it.
Measure the thickness of your material. Some will already be labeled for you on the box or use a ruler. Select the shape icon again and add another square to your canvas.
Click on the lock to unlock your square and size it so that it is wide enough that both pieces will interlock.

When using the chipboard and some My Minds Eye cardstock, I used the width of .1”. You want the height of your small line to be a smidgen over half. This custom cake stand was 10” high so my squares were .1×5.3”. Duplicate that square.
The thickness of the Cricut Chipboard is 2mm or.08″
Now use one shape and have one square centered towards the bottom of the shape and the other square centered on the other shape on the upper portion. Use your slice function again like when we made our shape originally flat.
There are additional clouds on this cake stand because it would be pretty wobbly without it. Just adhere two to each portion of the base to create a squared up leg of the DIY cake stand.
Adhere your material to your Strong Grip Cricut by using some painters tape or masking tape. Just whatever you have around that will also peel easily off your material. Move your star wheels all the way to the right before you load your mat into your Cricut Maker.
After you’ve hit your load button, make sure your Knife Blade is in the Adaptive Tool System and hit Go!
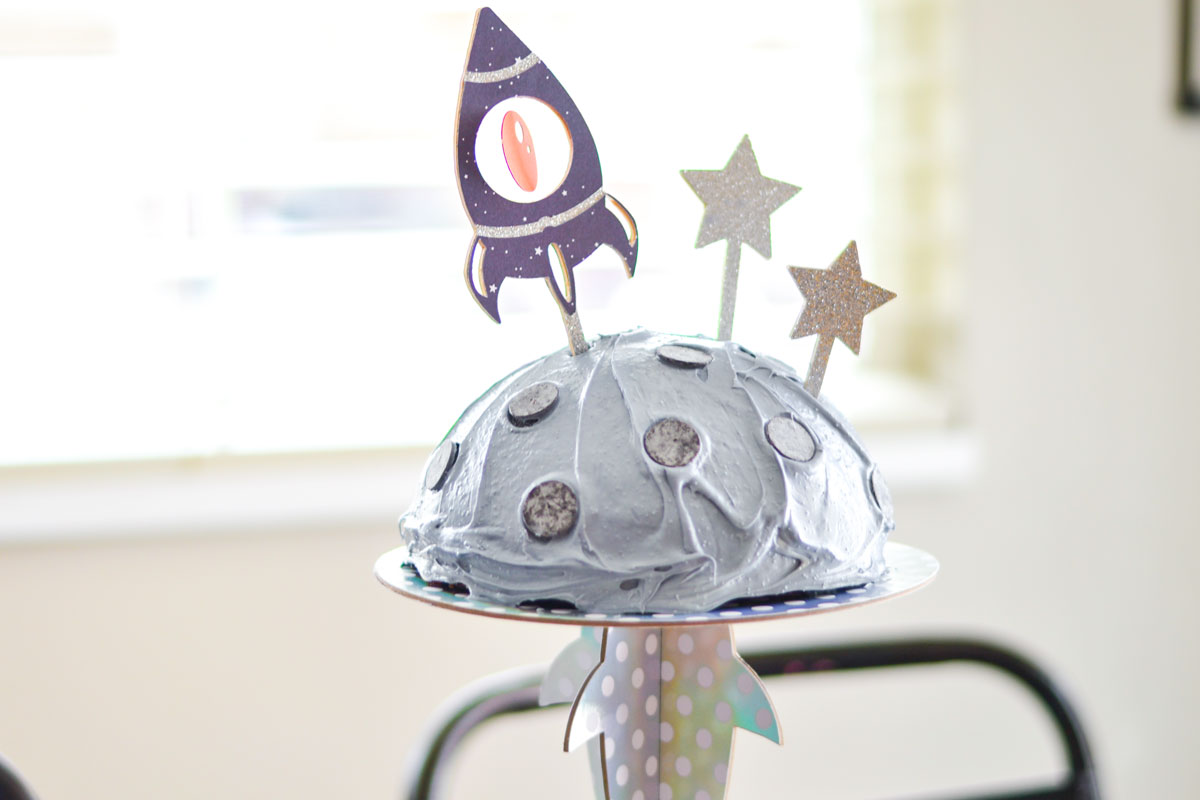
This certain cut took me about 3 hours. This rocket ship DIY cake stand does not have a bunch of weird angles, they’re all pretty
How do I glue Cricut Chipboard?
I've gone over this a few times and have learned that you cannot mix dry adhesive with a wet adhesive. I ran all of my cardstock through my Xyron Creative Station and then adhered it on top of my chipboard.
To adhere to the smaller peg pieces to the larger chipboard cake stand, use some hot glue and use it on the edges and then adhere the edges to the corners of the base.
My Knife Blade cut through my Cricut Maker!
Yes, this can happen. You need to pay attention to your cuts because some cuts may not need all the 20 passes. The Cricut Maker has had instances where it started cutting into the mat and then into the machine.
This is not normal but I also don’t know how Cricut will warranty the machine in those cases. Just watch your shape throughout the cut and even closer as the cut comes towards to the end.
Can you modify the Cricut Knife Blade settings?
No. Cricut Knife Blade material settings are not yet modifiable. This is because Cricut does a lot of research on the back end of the Makers materials and these are the settings they’ve used and tested.
I've never been able to edit my tools and select a Knife Blade for any of those because if Cricut doesn’t have it listed in the materials section, it probably didn’t work out for them and so they don’t want you ruining your machine.
To learn how to make your own wooden cake toppers using your Cricut, click here.

- Free Coffee SVG Files - Boom! Roasted - October 5, 2021
- Free Beer SVG Files - “It's What's For Dinner” - September 7, 2021
- DIY Back to School Banner with Cricut - August 13, 2021


Hey, Let's Chat!