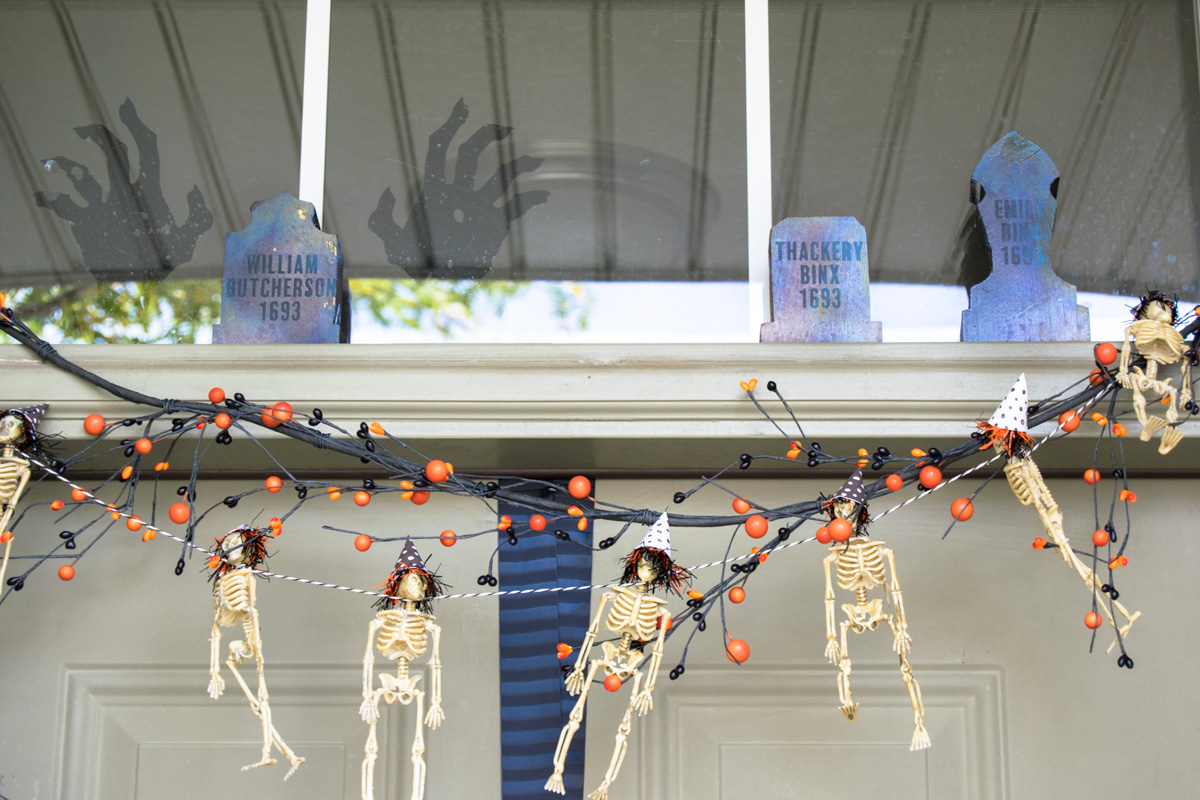
I love the movie Hocus Pocus so I had to make some Hocus Pocus decoration for my front porch. Halloween is the perfect time to bring out your inner Winifred.

So with my Fibromyalgia, decorating for holidays is kind of rough on my body. I do a few hours at a time and then I have to rest for just about the same amount of time. Using my Cricut for things like this save me a lot of energy and time so it's quickly become something I can't live without.
Although, I am ashamed I sent my son to school with his book report and he had drawn everything. I didn't think I'd ever let anything out of the house that wasn't perfect. That day was also a teaching moment to me that I don't have to do everything for them and nothing has to be perfect. You just have to be happy. I'm perfectly happy with being imperfect.

This year's front porch for Halloween was no different than other times. I had to do something grand that I love but I also had to pick something that wasn't going to make me lose my energy. This front door Hocus Pocus decoration is just the right amount of project I can handle.
Supplies for your Hocus Pocus Decoration
- Cricut Maker
- Cricut Knife Blade
- Cricut Scoring Wheel
- Cricut EasyPress 2
- Strong Grip Mat
- Cardstock
- Basswood Sheet
- Chipboard
- Black Kraft Board
- Glitter Iron-On Vinyl
- Hot Glue
- Scor Tape
- Various Ribbon
- Wood Beads
- Cricut Design Space File

So you first want to gather all your supplies and open the Cricut Design Space File. You're going to need three of the blades that the Cricut Maker use. You'll need the Knife Blade, the single Scoring Wheel and the Fine Point Blade.
How to Cut Wood with the Cricut Maker
To cut wood with your Cricut Maker you will need the Cricut Knife Blade. The blades on the knife blade are really sensitive so it will shatter if you're not careful. Leave the cap on when it's not in use to keep it from dulling.
To prepare the wood you'll need to use some masking tape and a Strong Grip Mat. You want to tape your material to the actual mat because the knife blade makes several passes so that it can slowly build up the pressure between each pass and you don't want your material to shift.
Each time the Cricut Knife Blade passes, the pressure gets a little firmer so it is essentially working as a Xacto blade would work. You can't just cut through wood with one pass and expect it not to split.
Load your knife blade into the Adaptive Tool System on your Cricut Maker. Place your piece of basswood on to your Strong Grip Mat and then use some masking tape and tape the edges down. Load it into your machine and select go.
The Cricut Maker will take around 12 minutes to do three 4″ circles for your Hocus Pocus Halloween decoration. Use your glitter iron-on and the EasyPress 2 to get your iron-on vinyl to stick to the wood. I used a temp of 340° and I only did about 15 seconds. Any longer than that the wood would start to warp. If the wood warped under my EasyPress,
I just flipped it over and pressed for a little bit longer to keep it hot and then placed something heavy on top so it would lay flat.
Best Glue to Use on Chipboard
When you're wanting to use glue on your Cricut Chipboard you have to choose if you want to use a wet adhesive like Mod Podge or if you want to use a dry adhesive like Xyron. You cannot mix the two on top of each other. When you want to paint chipboard, you want to seal it first. You can seal your Cricut Chipboard with some Mod Podge or spray sealant. Then you'll paint as usual.
For this project I used the black kraft board and ran those top circles through my Xyron, then on the other side I used some wood glue to adhere it to the wood circles.
How do I assemble a paper Rosette?
I used this really cute cardstock from My Minds Eye for the paper rosettes. You'll first put the rosette cardstock on your mat and then load in your scoring wheel. The project will score first and then it will require the fine point blade to cut the shape out.
Accordion fold your paper rosettes and then add some scor-tape along the ends to connect 3 of your fans together to form the rosette for your Hocus Pocus decoration. Now that you have the fans glued together end-to-end, it's time to make it pop. Just press on the center of the accordions and your rosette will expand. See here on how easy it is to make a paper rosette.
Use the round wooden circle and place some hot glue on the edges and lay it in the middle of your rosette. And now you're ready to assemble your Hocus Pocus decoration.
Use some 2″ wide ribbon and start at the bottom and work upwards. I left about 4″ in between each paper rosette. I used about 48″ at the top and then folded it back over to create a loop.
What is better, the Cricut Explore or the Cricut Maker?
Confession - I have an Explore Air 2 and a Cricut Maker. While I love both, I'm always using the Maker and really only bring out the Air 2 when I'm in a rush and don't want to wait to finish cutting one project at a time.
I've used my Maker since August of 2017 when it was released and I sort of found that I love this machine more than I ever thought I would. The ability to cut basswood and now the scoring wheel can give me crisp and deep score lines has changed my crafting ways in the best way possible.
The force of the Cricut Maker is greater than the Explore and so I feel like my cuts are cleaner and I don't have to worry about double cutting my images as often. I definitely recommend upgrading if you can afford to and if not, the Cricut Explore Air 2 is a great option.
See more Halloween Hocus Pocus Decoration by clicking on the photos below.
This is a sponsored conversation written by me on behalf of Cricut. The opinions and text are all mine.

- Free Coffee SVG Files - Boom! Roasted - October 5, 2021
- Free Beer SVG Files - “It's What's For Dinner” - September 7, 2021
- DIY Back to School Banner with Cricut - August 13, 2021