
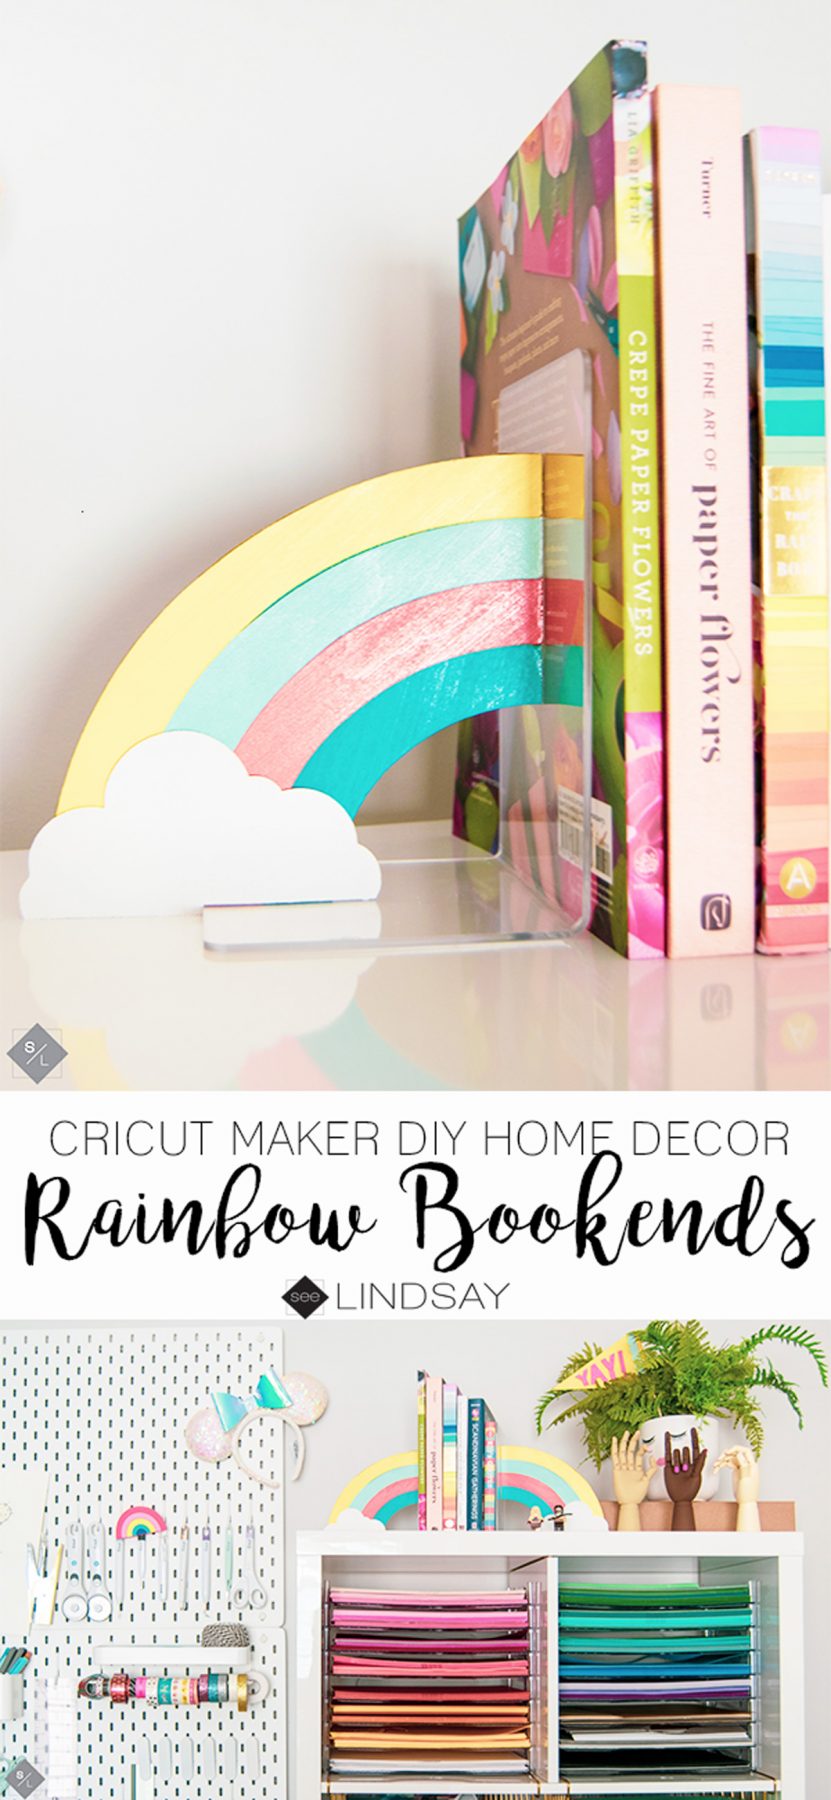
Create these perfect Rainbow DIY Bookends using your Knife Blade on your Cricut Maker. This post contains affiliate links. Thank you for your support.
 This post contains affiliate links. Thank you for your support.
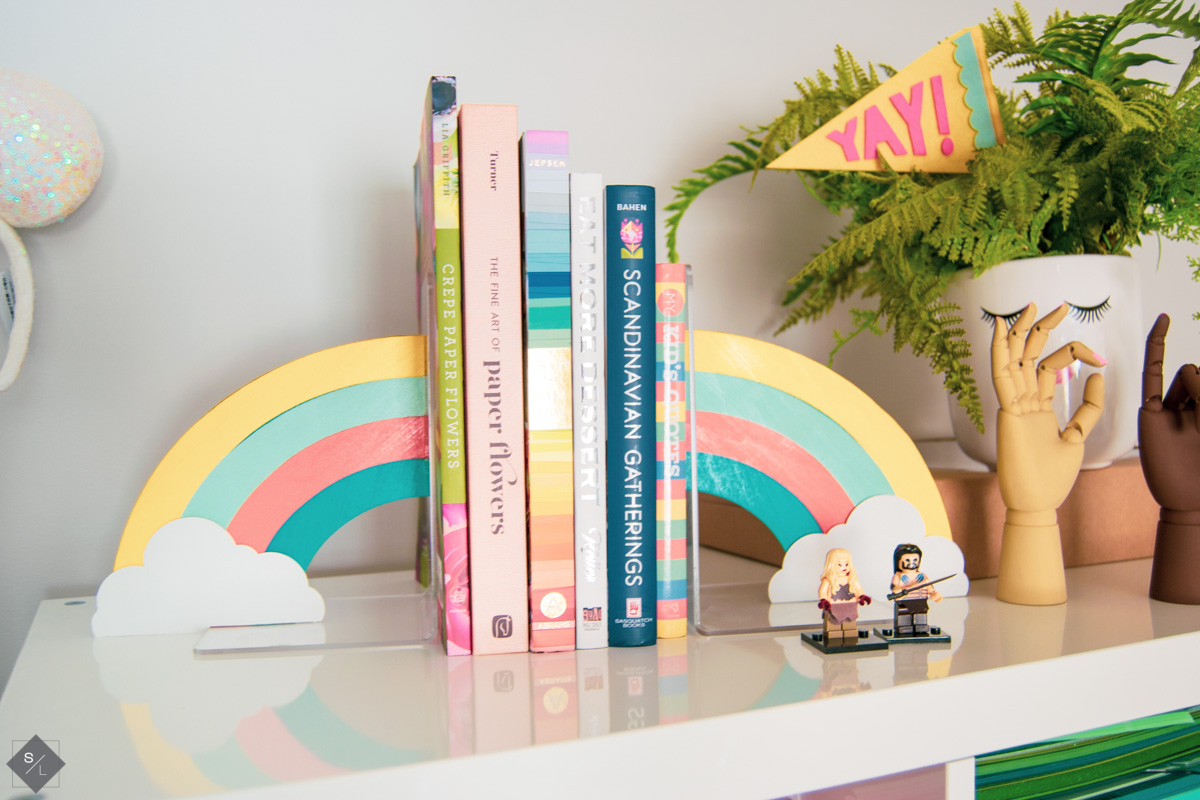 I've been super busy at home and mainly my bedroom…not that kind of busy. I've been making a craft area in my master bedroom and also using it as my blog studio. When I was designing this area I wanted lots of white with rainbow accents. That's when I came up with the idea of making rainbow bookends so I figured what better way to make them than with my Cricut! They're pretty easy to make, just a bit of a long process waiting for the glue to dry. Let's get started on our DIY bookends!
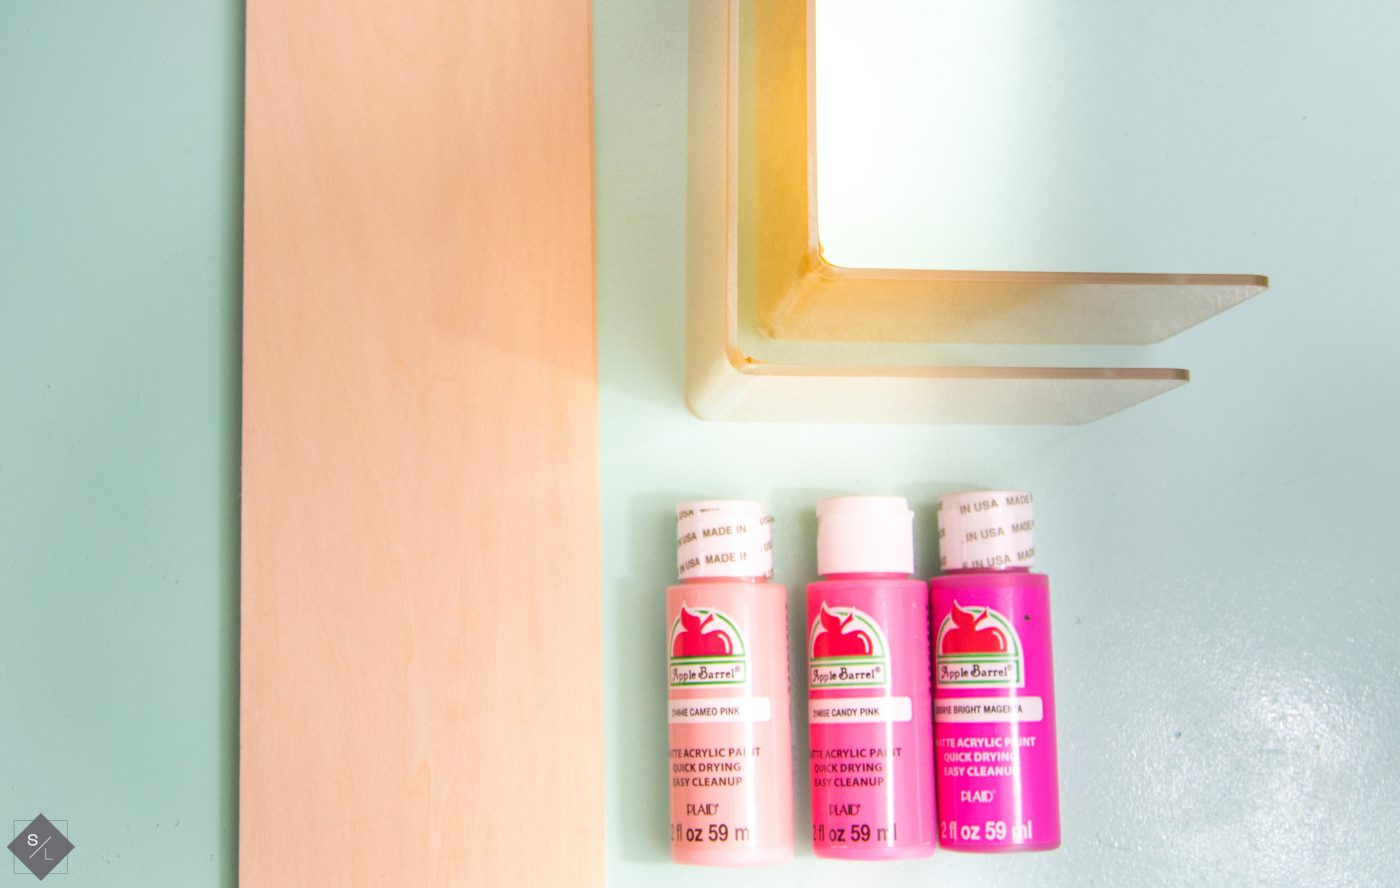
Supplies for your Rainbow DIY Bookends
- Clear Acrylic Bookends
- Basswood
- Canson Art Board or Cricut Chipboard
- Glue
- Cricut Design Space File
- Cricut Maker
- Cricut Knife Blade
 How do I cut wood with my Cricut Maker?
 How do I cut wood with my Cricut Maker?
The easiest wood to cut with your Cricut Maker is Basswood. It is still durable even though it's 1/16″ thick. If you cut Balsa with your Cricut Maker, it can easily break and is too flimsy for this project. It may save you a few dollars on the wood but it's not worth it.
Where can I buy wood for my Cricut Maker to cut?
I have found that Hobby Lobby has the best selection, then Joann's and then Michaels. It may just be my certain stores that don't have a great selection but craft or hobby stores are where you want to go to buy the wood sheets.
How thick of wood can my Cricut Maker cut?
The best results I've had is when I cut 1/16″ basswood. You can cut 3/32″ as well. The maximum size that your Cricut Maker can cut is 2.4mm and that is equivalent to 3/32″.
How do I assemble my DIY bookends?
 So this is the easier part. I began with painting my rainbow in my desired colors and allowed it to dry. I started by gluing together 3 of the base pieces of the artboard and then glued my base wood piece to it. I used some binding clips to hold it tight as the glue was drying.

Next, you'll do your outer layers of the rainbow. Again, use your binding clips to hold it together until it is dried. You can also use hot glue if you want but my crafting glue is what I had on hand and it dries crystal clear. 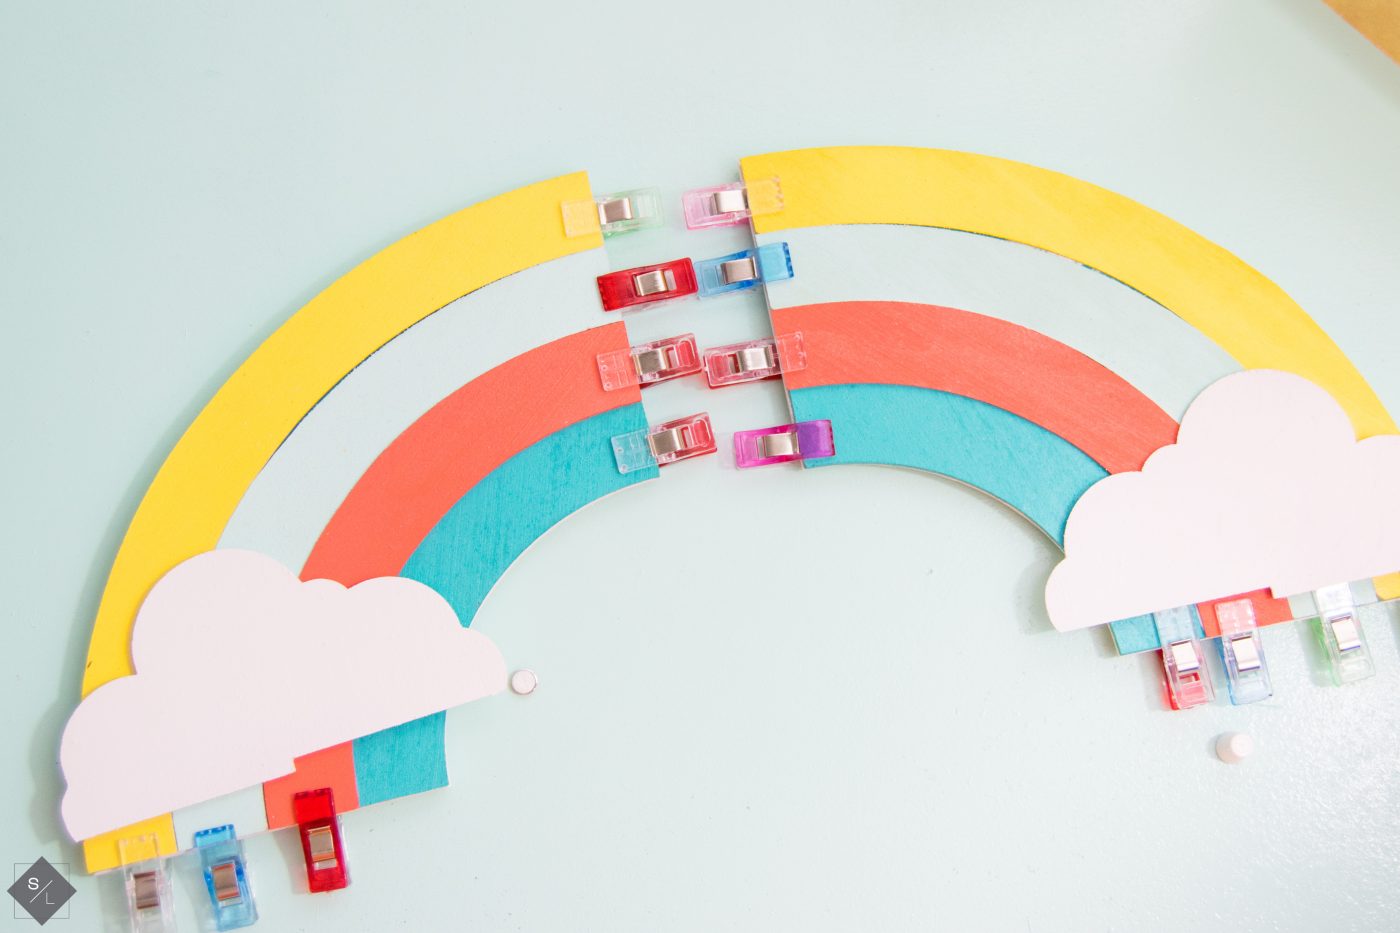
Don't put on the rainbow cloud pieces yet!
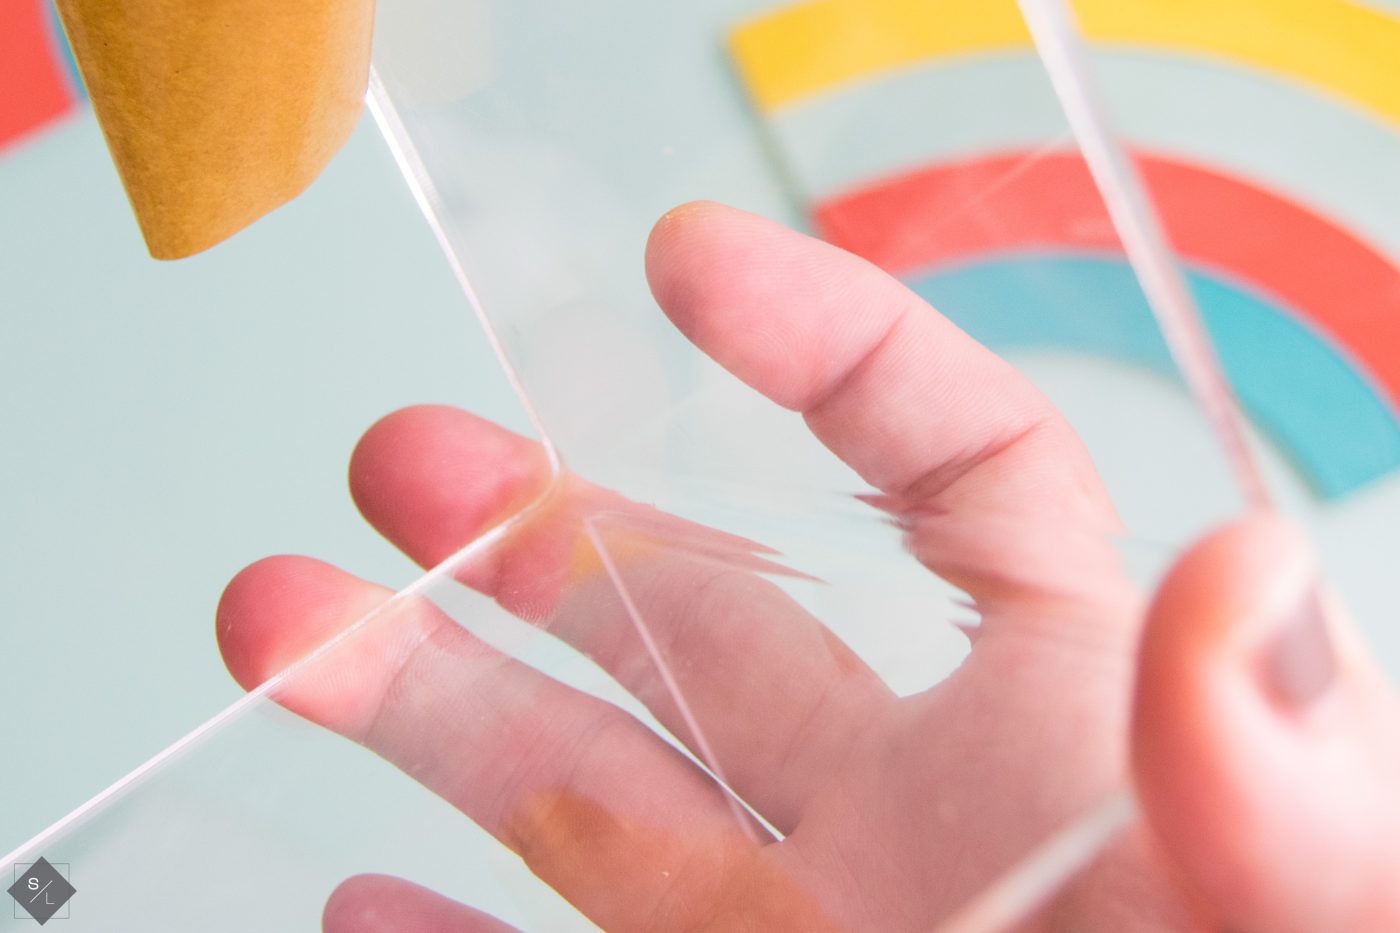

After you've allowed your rainbow to dry, adhere it to your clear acrylic bookends. I placed glue on both ends and then placed it on the bookends. I then put some books to either side of it to hold it up straight as I waited for it to dry.
Once it's completely dried and set, it is now time to add the clouds. I made a notch in the clouds that is 1/8″. This will help me press the cloud straight to the bookend and be square with the shelf. Just use some binding clips to hold it in place again and then allow it to dry. 

How long does the Cricut Maker Knife Blade take to cut wood?
The thing that took the longest was the drying of the clue. Since these aren't intricate, the cutting was fairly fast. The Cricut Maker will make 14 passes when cutting on the 1/16″ basswood setting.
You need to plan on having your Cricut Maker connected to a desktop or a laptop. The reason for this is that the Knife Blade can take sometimes hours to cut and you could have your phone turn off, or get a call and then your project will be lost. For all the Cricut Maker Knife Blade tips I recommend, go here. 
I've displayed these in my Craft Room for some fun motivation to get creative on any project I make. Now check out some more home decor items you can create with your Cricut.

- Free Coffee SVG Files - Boom! Roasted - October 5, 2021
- Free Beer SVG Files - “It's What's For Dinner” - September 7, 2021
- DIY Back to School Banner with Cricut - August 13, 2021


Jenny says
These are adorable. I’ve been looking at book ends for my kids and I never thought to get the knife blade and make them. Very Pretty!
Mary Hunnicutt says
Oh my goodness! These are so cute! I just got a Maker and plan to make some wall decor using the chipwood. Thank you for the tips!
Michelle James says
Wow! These are just beautiful!