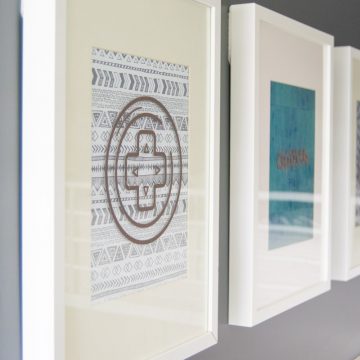
Did you know you can create your own wedding table numbers using your Cricut Explore and embossing them with your Cricut Cuttlebug? It's so easy, see how to below. This post contains affiliate links. Thank you for your support.
Have you ever wanted to create your own table numbers for your wedding or any event? I'm going to show you how to create your own table numbers using your Cricut Explore and your Cuttlebug. I've never used the Cuttlebug until this project and now I'm in love! I love being able to add texture to my projects and unless you buy embossed paper, it's a little hard. Using embossing folders from the Cuttlebug is the easiest way to add texture to your projects.
For this project, I cut out my table numbers using my Cricut Explore. I've included the cut file below. Once you've cut your numbers, place them inside the embossing folder and run through your Cuttlebug. 

Supplies
- Cricut Explore
- Cuttlebug
- Embossing Folder
- DIY Table Numbers cut file
- Opposites Attract Font
- Pearl Paper
- Wooden Skewers
- Hot Glue
When using the Cuttlebug, you want to be sure to use the correct folders and plates. When you emboss, you'll use the B plates and the A plate. Sandwich your embossing folder in between the two B plates and place it on the A plate. Place it in your Cuttlebug and use the handle to crank it through.Both my images were more than 7″ long so I had to get creative. I matched up the polka dots before I ran it through again so that I could have a clean embossing. The more complex the image, the harder it will be to match but it can be done so don't let size hold you back.
Place some hot glue on the back of your numbers and add the skewer so that they're even heights. The heavier the cardstock, the less skewers you'll need but you want it to hold up all night. Secure it again with a little bit more glue on the back.
Place it in your centerpiece and you're done. I decorated this board with some of the flowers I cut for our Twin Baby Shower we threw a few months ago. Happy Wedding!
This is a sponsored conversation written by me on behalf of Cricut. The opinions and text are all mine.
- Free Coffee SVG Files - Boom! Roasted - October 5, 2021
- Free Beer SVG Files - “It's What's For Dinner” - September 7, 2021
- DIY Back to School Banner with Cricut - August 13, 2021


Roseann Hampton says
What a great idea! Thanks for sharing!
Chloe Crabtree says
These are beautiful! I don’t have a Cuttlebug but I do have a Cameo that I need to learn how to use! This is on my to do list for this year, I better get to work! Thank you so much for sharing at Celebrate Your Story!
Lindsay says
I love my Cricut. I couldn’t live without it. This Cuttlebug is a new toy that I’ve been enjoying.
Lina says
They look great! Thanks for sharing at Sew It Cook It Craft It.
Kristy says
These are lovely and really unique! The texturing of them really sets it off.
Lindsay says
Thank you!! I love what Cuttlebug was able to do