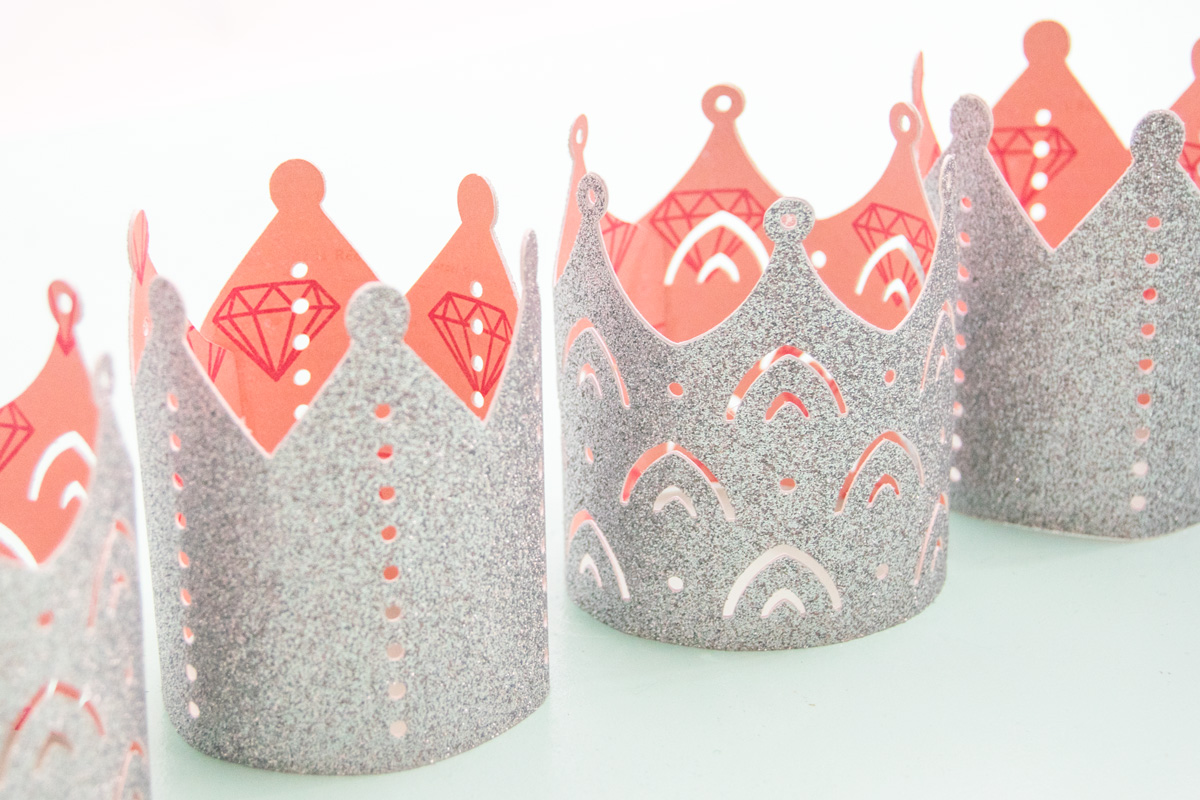
These DIY Princess Crowns are made perfect by using your Cricut machine. Create them in minutes and have your princess enjoy her party in style.
I loved preparing for this easy Princess Party. It was made complete by making this easy DIY Princess Crowns. Create them out of glitter cardstock and see how easy it is to cut with your Cricut machine.
Supplies for your DIY Princess Crowns
- Glitter Cardstock
- Coordinating Paper
- Xyron Creative Station or any craft adhesive
- Cricut Design Space File
- Cricut Maker or Cricut Explore
 How to make an easy Princess Crown
You're going to begin by opening the Cricut Design Space File above and setting your Cricut machine to Glitter Cardstock (get more information on this below). Load your glitter cardstock on to your mat and cut, select finish on your computer and set aside.
Next, select to cut your image again but this time mirror the image. Load your coordinating paper on to your mat and then cut again.

Run your cardstock images into your Xyron Creative Station right side up. This will turn your images into stickers and then you can sandwich them together. If you're using wet adhesive, set it aside to dry.
Connect the ends of your DIY Princess Crown together and use your easy craft adhesive. Use two clips to secure the ends together so that it will ensure that they'll stay adhered.

You can connect some elastic to the paper princess crowns by using a hole punch or stapler. Or you can use these paper princess crowns as place card holders.
How do I cut Glitter Cardstock with my Cricut?
Cricut Maker and Cricut Explore have different looks in Design Space when it comes to choosing your materials.
If you have a Cricut Maker, you're going to want to click on the ‘Choose More Materials' link and it will pull up all that the Cricut Maker has been tested to cut. Just choose Glitter Cardstock and then press the Go flashing button on your Cricut Maker.

To cut glitter cardstock on your Cricut Explore, set your smart dial to ‘Custom' and then the drop-down menu will include Glitter Cardstock. Select that and then press the Go flashing button on your Cricut Explore.
- Free Coffee SVG Files - Boom! Roasted - October 5, 2021
- Free Beer SVG Files - “It's What's For Dinner” - September 7, 2021
- DIY Back to School Banner with Cricut - August 13, 2021


 How to make an easy Princess Crown


Hey, Let's Chat!