Keeping a Craft Room clean and organized is hard. I've learned through the years some cool and pretty-to-look-at Craft Room Organization Ideas that I can't wait to share with you.

This is a sponsored posts brought to you by DYMO, all opinions are my own.
My Craft Room Organization Ideas will take your space to a new level. My craft room is part of my bedroom and it has definitely seen better days. I tried by putting my photo area against my wall and then have a desk in the middle and I think it just took up too much space for it to be efficient.
A trick to remember when you're organizing your craft room is to measure first! I say this laughing because I am infamous for just trying to get something done and not measuring so it just packs in tight together. I bought some cabinets a few years ago along with 10 rubber totes and none of them fit. I try to be on top of it and then I do stuff like that and don't care to finish.

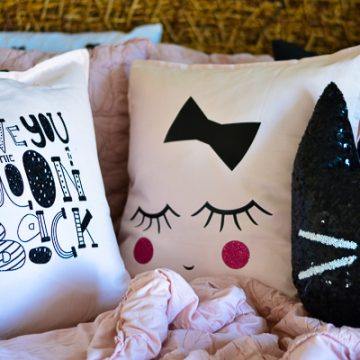
To make your own Rainbow Bookends, check out how I made them with my Cricut Maker here.
What kind of DYMO Label Maker should I buy?
The COLORPOP! Label Maker is the perfect label maker to buy. It fits in your hand and you can easily type the sayings you need just like a phone. The new COLORPOP! tape comes in seven sparkly colors to match any decor. I have a white room with bright accents so the Pink Glitter COLORPOP! tape is perfect.

Where do I begin when organizing my Craft Room?
When you start organizing, go ahead and grab some laundry baskets and separate your piles. I like to arrange my piles into categories, so glue or sewing for one. Then once everything is separated, I place them in clear bins.
Begin by labeling the bins and making sure that only those things go into those labeled properly. If you just start throwing things in there without a plan, it'll just become more cluttered and inefficient.
It will get worse before it gets better so just remember that. This is also a perfect opportunity to get rid of things that you don't use. Donate them to local schools or charities, somewhere where you know they will get used and cherished.
How to organize Craft Tools on your wall
I grabbed a few peg boards from Ikea which are inexpensive and stylish. I've seen where people will get the actual pegboard from your local hardware store and you can paint it any tone you want.
Hooks are a must and I love how my Cricut tools have holes in the handle so that they can easily be hung. I also took some hooks and organized all my cutting mats so that they'd hang for easy access.
I use a variety of hanging bins so that I can have many small items in the tiny drawers. I grabbed this cool little system from my local craft store and it hooks right on to the peg board so that I can keep all my cutting blades inside so I don't lose it all in the end. I used my DYMO COLORPOP! to label the bins so I can keep track.
Easiest way to store Cardstock
I have these paper trays from We R Memory Keepers and they are perfect. They fit 12″ cardstock perfectly. I prefer to color code my solid cardstock so that it's easier to find. For scrapbook paper with designs, I keep them in a cart standing upwards so that they're easily accessible. Another great thing to use if you don't have space for shelving is the shoe holders from Ikea - Hey, Let's Make Stuff has perfected this idea.
These Ikea shelves are perfect for holding other boxes full of random things. On the shelves, to hold my Silhouette and Cricut, I just kept one of the dividers out of the assembly and it left a perfect amount of space for my machines.
To store my EasyPresses, I grabbed this shoe shelf from Ikea and I store it underneath my desk along with the other bins that I've labeled with my COLORPOP! Label Maker.
My biggest pieces of advice for organizing your Craft Space
Allocate your space evenly and effectively. Use your walls, find cabinets that will fit your space and jimmy rig them to be most effective to you. You cannot
Use clear bins to organize and label your items. Make sure you know what is inside of them and put them back when you're finished. That last part I have a hard time sticking to but now that they're labeled with my COLORPOP! Label Maker, it makes it much easier.
With the COLORPOP! Label Maker you can customize your labels with 6 font sizes, 8 text styles, 4 borders, and 150+ emojis and symbols. You can use any DYMO D1 sized label tape in it up to 1/2″ so use whatever color you desire.
Where to buy Craft Room Storage Items
- We R Memory Keepers Stack and Nest Paper Trays
- Cricut Maker
- Cricut Explore
- Silhouette Cameo
- Silhouette Alta
- Ikea Kvissil Wall Storage
- Ikea Kallax Shelving
- Ikea
Skadis Peg Board System - Ikea Malm Drawers

- Free Coffee SVG Files - Boom! Roasted - October 5, 2021
- Free Beer SVG Files - “It's What's For Dinner” - September 7, 2021
- DIY Back to School Banner with Cricut - August 13, 2021