
Use your Cricut to cut out this felt Hedwig ornament for your Harry Potter themed Christmas tree. 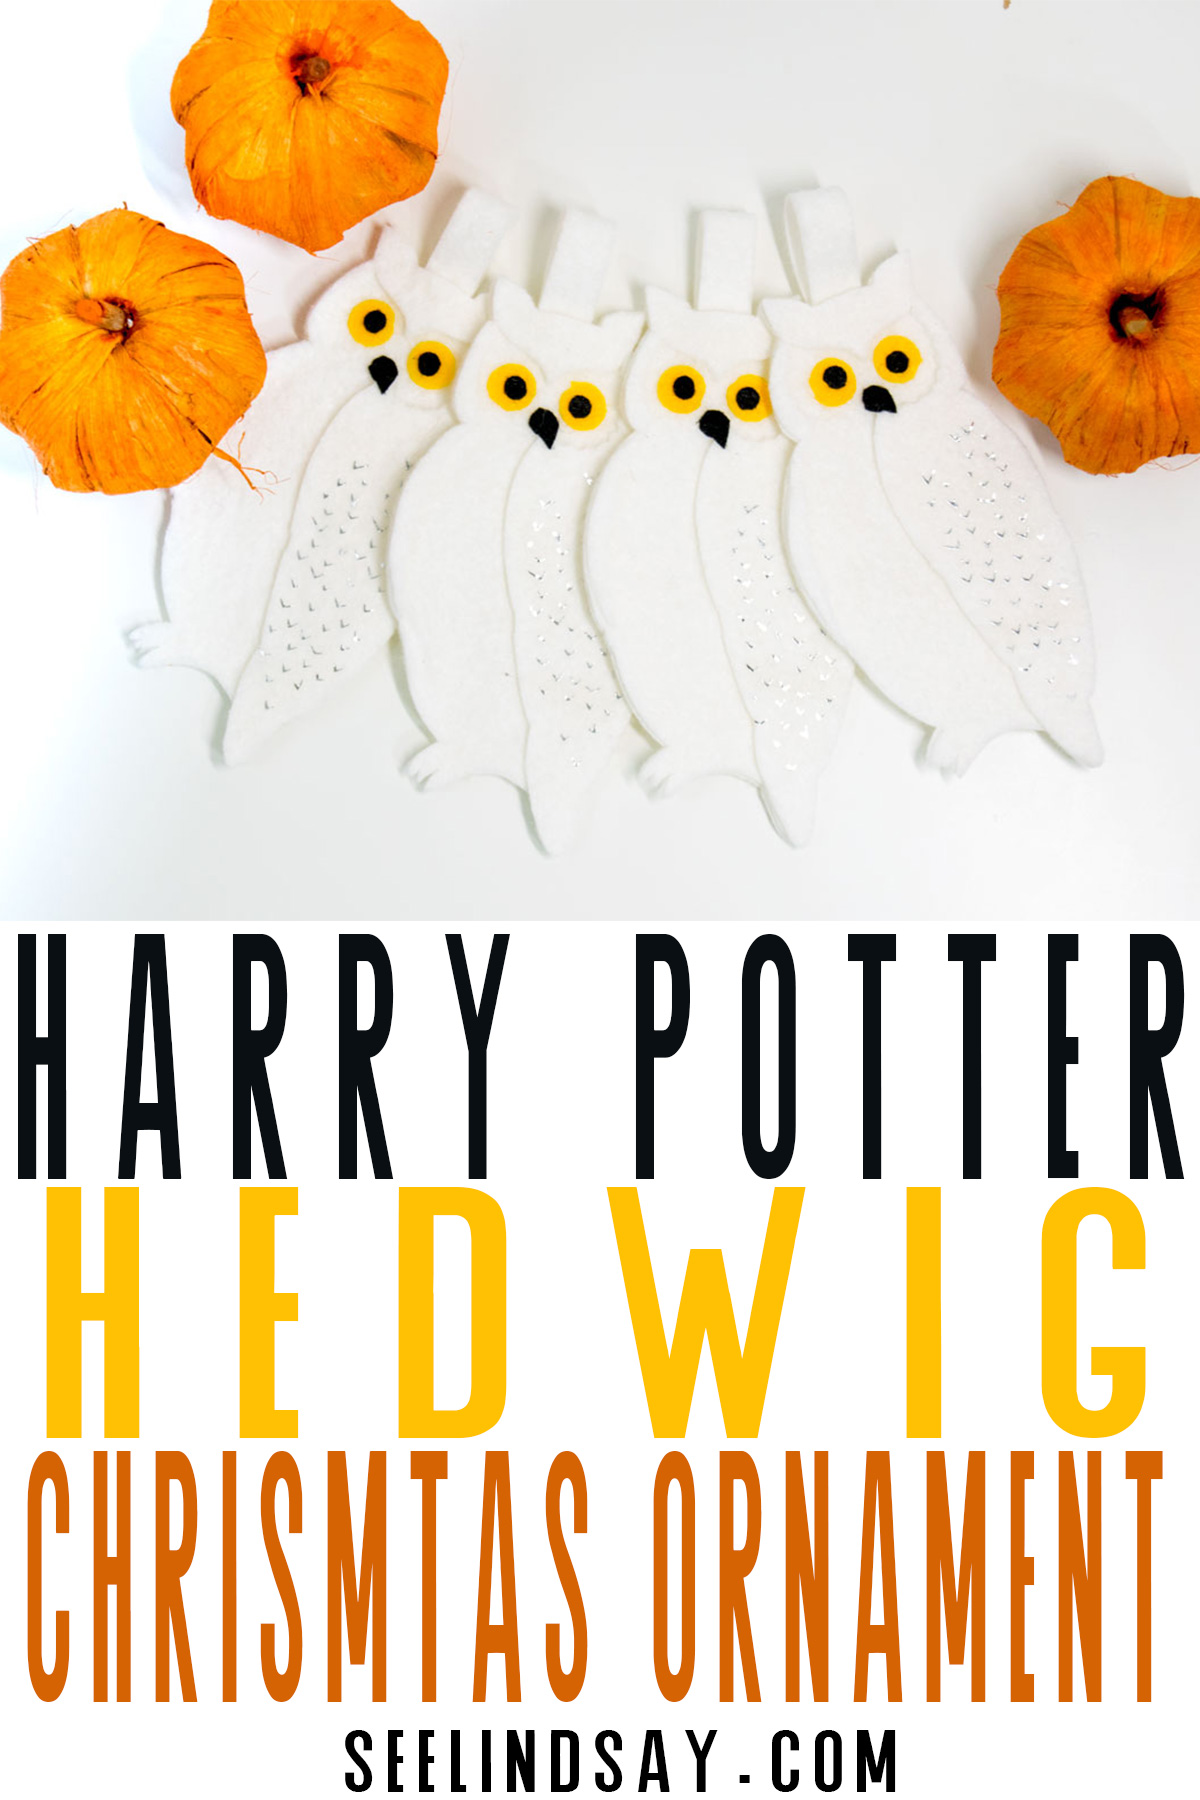 This post contains affiliate links. Thank you for your support.
Anyone who knows me knows how much I love Harry Potter. I've seen all the movies but have only read the first two books. Don't get after me for my lack of HP knowledge but I can make a mean Harry Potter Christmas Tree. Create these felt Hedwig ornaments to hang along with your other DIY Harry Potter ornaments.
Supplies for your DIY Harry Potter Ornament
- Cricut Maker
- Iron-On Vinyl
- White Felt
- Yellow Felt
- Black Felt
- Fabric Glue
- Cricut Design Space Hedwig File
To make your Harry Potter Christmas Ornament, use your Cricut Maker to cut out all of your felt pieces along with your feather detail out of the iron-on vinyl. * Because of the small pieces that needed to be cut by the rotary blade, the blade will over cut on those pieces causing them to break away easier from the other felt. That's ok. Just continue gluing those pieces to the top of the owl cut out and you won't be able to tell.
  You can use an iron for your HTV or I have an < EasyPress so I just use that. The most important thing to remember when using iron-on vinyl is that you need to mirror your image. The most important thing to remember when you're pressing the iron-on vinyl on your surface is to have no steam.
If you're using foil iron-on vinyl, always wait for it to cool before you peel. I just wait until it is cool to the touch. You will need to give it a firmer pull when you take the carrier sheet off of your foil iron-on.
How do I glue felt together?
I use Aileen's Fabric Fusion to glue my felt together. It is permanent and gives a great adhesion without having to add heat. It sets in 2-4 hours or there is a quick-dry fabric fusion that dries 5X faster.
Hot glue is also an option but it's hot and it hurts when you burn your fingers 😉 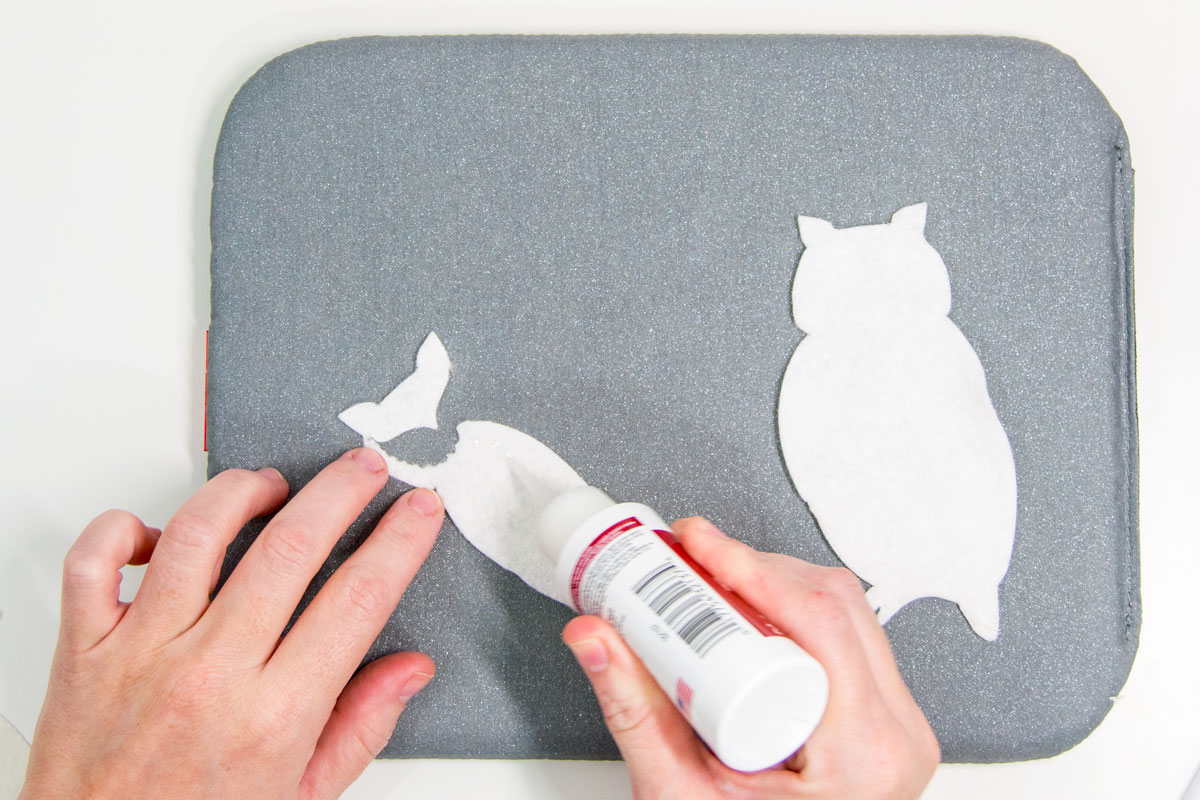

 Take the small tab and place a dot of glue at the end and then fold it in half. Use a clip to hold it in place while it dries.
Now that the front of your Harry Potter Hedwig ornament is mostly dry, it’s time to assemble the entire ornament.
Place glue on the front of your back piece (this will be the middle). Put your tab between Hedwig's ears and then put a bit more glue on the bottom of that tab. Put your top piece over the glued area and the tab and then set aside to dry.  Once your Harry Potter ornament is dry, thread some twine or ribbon through the loop and tie. You’ll now have your DIY Hedwig ornament complete. Stay tuned for more Harry Potter ornaments to be revealed throughout the season.

- Free Coffee SVG Files - Boom! Roasted - October 5, 2021
- Free Beer SVG Files - “It's What's For Dinner” - September 7, 2021
- DIY Back to School Banner with Cricut - August 13, 2021


Jessica says
I love these!!!
Lindsay says
Thank you! I love them too!